

If you are a creative seller and always try to push your limits, selling online can be a lot of fun. Most of your time as a merchant is spent managing your E-store and building relationships with customers. Apparently, a product picture is crucial when it comes to online purchasing.
We hope to inspire you as a photographer through this article so you can create your own DIY product photography studio. In this article, we will bring you:
- Do you need a DIY product photography studio?
- Creating a workflow for your product photography
- Product Photography on your smartphone
Why do you need a DIY product photography studio?
Unless they get their parcel, shoppers can’t touch the products that they order online. Hence, you can simplify your customers’ buying experience by displaying your products beautifully. It is important to showcase your products in captivating product photos and unique collection pages.
Let’s say you are selling t-shirts, shoes, trousers, and shirts for men and women. You can pair casual shoes with t-shirts and create a party/outdoor collection page. Or a Back-to-office one, maybe! With a punch of product photography and a collection page, you can attach more buyers. Also, grouping your products together will also make it easier for customers to shop.
With a bit of practice, you can easily improve your product image significantly and saving a bunch of money for outsources.
This eCommerce photography guide has been broken down into simple steps that you can follow to create your own in-home studio. Some merchants started DIY product photography as a hobby, and they are doing great in their niche. Let’s start with the basics.
Make sure you prepare everything on the list:
- Device (camera, smartphone)
- Lighting
- Background
- Camera Stand/ Accessories
Creating a Workflow for Your DIY Product Photography
You can take photos that sell if you treat your products like influencers. Market them with unique messages and plan your shoot, just as the influencers do. Your product photoshoot should be planned and organized. To capture images that are focused on the products and their benefits, spend at least one day in your studio.

1. Make a plan
You should plan your photoshoot session before you turn on the lights and take action. The planning aspect of eCommerce photography is crucial. You should book your slots at least one month in advance, depending on the product catalog. You can use a daily planner to keep track of all ideas related to product photography. These are some questions you might ask:
- Are there other locations than your studio that you could use for the shoot?
- How can artificial lighting be used during a photoshoot?
- Do you need an assistant to help with a project?
DIY product photography requires creativity and an active approach. The photoshoot planning will definitely make the process easier.

2. Prepare
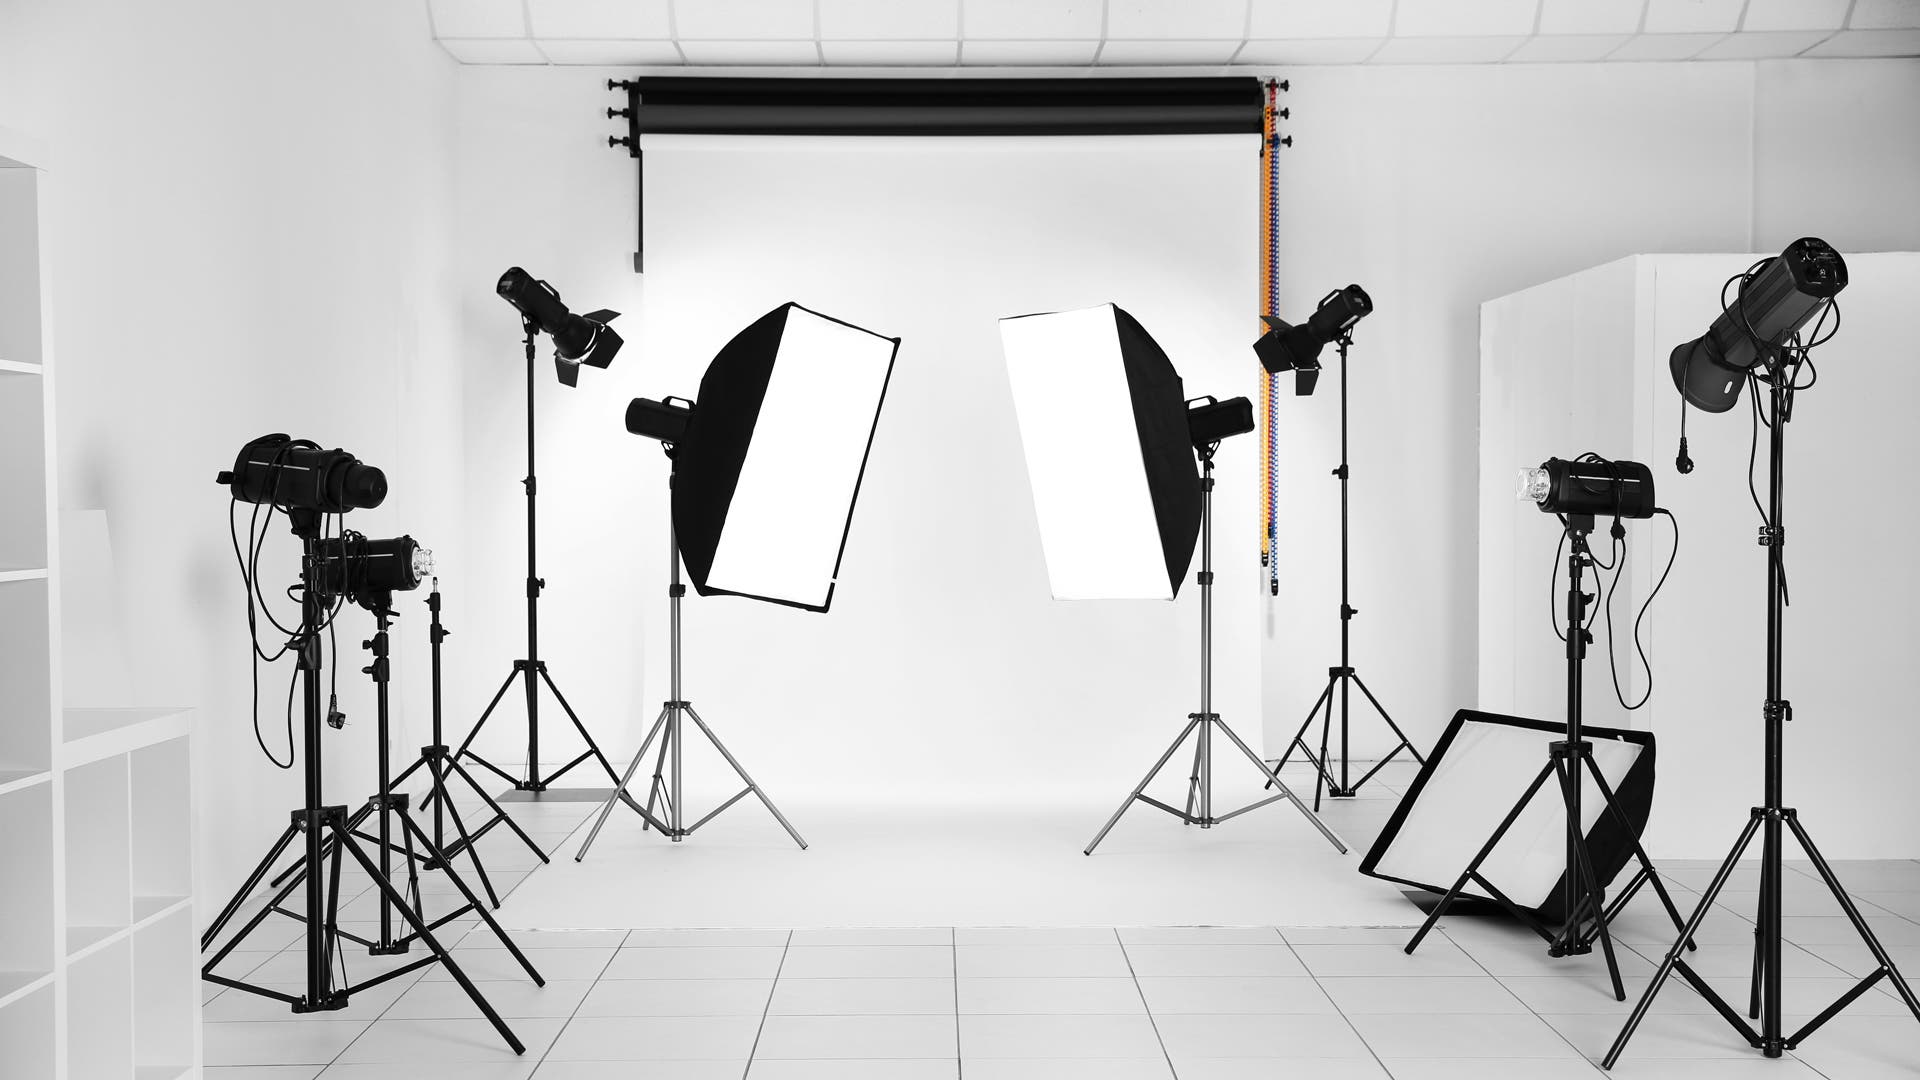
Building your indoor photoshoot is interesting. Are you a homeowner with a garage or a spare room? It is time to turn that space into a product photography studio. You can refer to Pinterest to get an idea about how merchants have built their in-home product photography studios.
While you are building your studio, you need to be extra careful about lights. It’s hard to resist the temptation to take photos under natural lighting. It would be a good idea to consider the effects of artificial lighting on your products.
You must prepare the space for professional and smartphone shots when you create your DIY product photography studio. Two different approaches are required for photos taken with smartphones and professional cameras. You should use a combination of both professional and smartphone photography in your home product photography studio.
3. Choose products style

Before you begin taking pictures of your products, make sure you do a thorough inspection. You see the true influencers don’t seem to be too awkward in front of the camera. Why should your product have flaws during a photoshoot?
Take off any labels and tags and inspect for damage. Think about the furniture and fixture merchants. They must prepare the background and polish the merchandise before the photoshoot to ensure the product and photograph complement one another.
Your final images will look better if you are more creative with your products before the shoot. If the photographs are not perfect, even the best product photography can go stale. If you’re dealing with apparel, you can use models and mannequins during the photoshoot.
4. Capture your shot
All the work you have done so far has ensured that your backdrop and photos are ready to be clicked. You can now start to capture pictures. This is similar to when you take a few photos before sharing one image on social media. You should also take different photos of your products. Try different backgrounds and lighting effects.
It would be great if you could highlight important features during the shoot. It’s important to experiment – get as many shots as you can. You can experiment with the settings of your camera, such as focus, background, and lighting. This will allow you to see how images from products speak for themselves.
For every product, you should have at least 10-15 images so that after rendering and editing them, you are left with the best of the images.
5. Process The Image
After clicking images, the first thing to do is to make a backup. Processing images is all about refining and improving your product images and making them ready for upload.
You should maintain uniformity in all your photos. It’s crucial ensure uniform lighting, aspect ratios, and frames for each product category.
Check out product images of Netflix Shop – Most of the time; they have used a white background. There are product images that have different focus and camera angles. All images are uniformly lit, have the smoothness and an even balance of shadows and natural light.
Batch editing is when you select all images from one category and make common changes. Individual editing follows batch editing, where you can make changes to individual product images.
6. Review and Publish
Before you can publish your work, carefully review them and make sure they are exactly what you want. To stand out among your competitors, you can create unique collections of products. For example, if you sell T-shirts, you can create collections for formal T-shirts, casual T-shirts, and so on.
Use Your Phone For Product Photography at Home
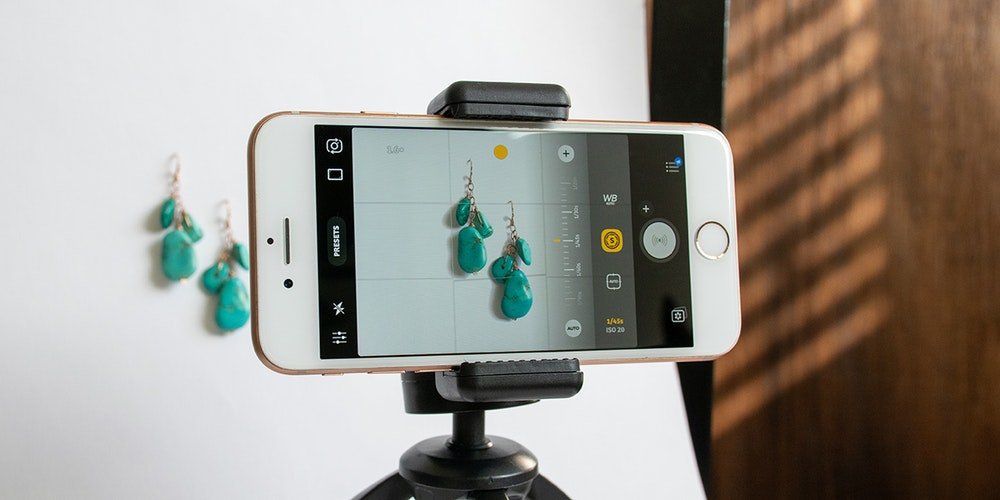
Make sure to include your smartphone in your DIY product photography studio so you can capture amazing shots. You should be careful with the angles and framework. Although most store owners are familiar with the basics of smartphone photography, here are some tips to help you take better pictures using smartphones.
1. Set up the Lighting
Low light images are not recommended for product photography. Before the shoot begins, lighting and camera settings will determine the final outcome. The lighting in your DIY product photography studio should be a mixture of natural lighting (either a window or ventilator), and artificial lighting (white lights, LED bulbs, etc.
It is worth taking the time to find the best lighting conditions for your product. There is no quick fix. It will take a lot of trial and error. Once you know how much lighting you require, everything else is simple.
You need to make sure the sun is shining through your window when you are photographing. However, try to avoid direct sunlight as it can create shadows. It might help to be patient and understand the optimal aspect ratio for your product’s photoshoot.
Artificial lighting allows you to have more control over your product photography. It can be difficult to manage studio lighting because of the many angles and light-diffusing methods that are available. You must thoroughly study your lighting setup before adding artificial lighting to your photoshoot studio.
2. Tripod Stands
You should have at least one tripod for every size of a smartphone. Tripods are oxygen to smartphone photography. These tripods are perfect for clicking products that have a large frame. They can also be used to capture highly focused images of your products.
3. Get your Backdrop
Backgrounds should complement your products.A too-busy background can distract from the subject and divert attention away. These backgrounds can make a bad impression if you’re taking photos for eCommerce products.
You can adjust the size of the backdrops to fit the product. To avoid shadows, portrait subjects should be at least three feet away from your backdrops.
Here’s a foolproof guide on how to set up your backdrop.
4. Adjust The Camera Angles
Studying images of products from your competitors is a great way to determine the best angle for your product. Some angles are better than others in eCommerce product photography.
This is the key to helping shoppers see your products in different ways and angles. A 360-degree view allows shoppers to visualize themselves wearing and using your products. Close-up photos of your products are also important. These shots allow you to capture the details of your products that would otherwise be overlooked. These are just five of the most popular camera angles you can use.
That’s all about DIY product photography!
We’re about to see some of the most outrageous celebrations and shoppers will go on a shopping spree again. You have the opportunity to increase your store’s conversion rates by setting up a DIY product photography studio in your home. This will allow you to upload images that are worth a thousand smiling faces. If you’re finding a place to showcase your work, check out these 10+ best website builders for photographers.
If you’re looking for a way to expand your online business into more sales channels to get more customers and a better conversion rate, you need an effective selling tool for your multichannel store. Take a look at LitCommerce – The easiest solution to manage everything in just one place.
In case you need more info, please leave us a message, we’re always ready to help!
Also, join our community for more exciting eCommerce news and tips!
All the best!

Comments 4