Amazon retail arbitrage is a business strategy in which individuals buy products at a low price from retail stores, online marketplaces, or clearance sales and then resell those same items on Amazon for a profit. It’s like buying low and selling high, but with the advantage of Amazon’s huge customer base.
So, how to start Amazon Arbitrage for beginners? Here is our updated guide, which includes eight steps:
- Step 1: Researching and preparing
- Step 2: Setting up accounts and tools
- Step 3: Finding products
- Step 4: Analyzing and purchasing
- Step 5: Listing products
- Step 6: Shipping and fulfilling
- Step 7: Managing finances and inventory
- Step 8: Providing excellent service and handling return
To be more specific about the actions in each step, let’s scroll down and check!
8 Steps to Start Amazon Retail Arbitrage for Beginners
As mentioned, our Amazon arbitrage for beginners guide involves learning the ropes (research and prep) and setting up your shop (accounts and tools). Then, you’ll find profitable products, analyze purchases, list items, fulfill orders, etc.
Now, we will present each step in detail.
Step 1: Researching and preparing
Before you dive headfirst into sourcing products for your Amazon Retail Arbitrage business, it’s crucial to lay the groundwork for it. Here’s what you need to consider:
- Understand the market
- Choose a niche
- Set a budget
1.1. Understand the market

The first and foremost action on Amazon arbitrage for beginners guide is understanding the market. This helps you grasp what products are in demand and which categories are the most profitable. Then, you can choose the most suitable category to start your Amazon retail arbitrage store.
Market research includes delving into some of the following aspects:
- Market trends: You should use tools such as Google Trends to check what products are currently popular. You can look at seasonal trends to understand which products sell better at different times of the year.
- Amazon best sellers: To identify trending products and categories, browse Amazon’s Best Sellers, Hot New Releases, and Movers & Shakers lists.
- Competition: Once you have found some potential industries, it’s time to research the competitiveness of that industry. Why? High competition may make it difficult to stand out and turn a profit. You can leverage tools like Jungle Scout or Helium 10 to analyze existing listings of sales rank, and the number of sellers for a particular item.
- Amazon seller fees: One of the most important things when planning to do Amazon retail arbitrage is to familiarize yourself with Amazon’s seller fees. These fees include closing fees, referral fees, and Fulfillment by Amazon (FBA) fees (if you plan to use it). These fees will eat into your profits, so factor them while calculating potential margins. You can find a detailed breakdown of Amazon’s seller fees in our articles.
- Amazon’s policies: Amazon has strict policies regarding product restrictions, counterfeit items, and seller performance. Thus, it is important to understand these policies to avoid account suspension. A good starting point is Amazon’s Seller Central Help pages.
1.2. Choose a niche
Once you’ve spent enough time researching the market, the next step in Amazon retail arbitrage for beginners guide is choosing the right niche.
To choose a suitable Amazon retail arbitrage niche, consider the following criteria:
- Personal interest: It is vital to start with a niche you are passionate about or have some knowledge in. This can make the process more enjoyable and less daunting.
- Profit margins: But, don’t just focus on passion. You also need to look for niches with a good balance of demand and low competition. Some tools (Jungle Scout, Keepa, etc) can help you identify products with a good sales rank and healthy profit margins after factoring in Amazon fees.
- Restrictions: Some popular categories, such as electronics, clothing, and beauty products, might require Amazon approval before you can sell. Actually, you should avoid sourcing products that are on the restricted list.
Here are 3 types of items that are generally good candidates for Amazon arbitrage:
- Seasonal items: These are items that are in high demand during certain times of the year. For example, pool floats and summer toys are in high demand in the spring and summer, and winter gear is in high demand in the fall and winter. You can buy these items on clearance at the end of the season and then resell them on Amazon for a profit the next year.
- Closeout items: These are products that a retailer is trying to get rid of quickly, so they may be marked down significantly.
- Open-box items: They have been returned to a retailer but are still in good condition. The retailer often discounts open-box items because it can’t sell them as new.
1.3. Set a budget
The beauty of Amazon arbitrage for beginners is its low barrier to entry.You can theoretically start with very little, but a realistic minimum budget to be comfortable and have wiggle room is around $500. Here’s a breakdown for a specific product to illustrate the costs:
Product: Brand name wireless headphones (originally priced at $75 at a retail store)
- Product cost: $50 (Let’s assume you find a good clearance deal)
- Amazon seller fees:
- Individual Selling Plan (per item): $0.99 (consider switching to Pro later for increased volume)
- Referral fee (varies by category; let’s assume 15% for electronics): $7.50
- Closing fee (per item): $1.80
- Shipping to Amazon FBA: $5 (estimated based on weight and dimensions)
Total cost per unit: $50 (product) + $0.99 (selling) + $7.50 (referral) + $1.80 (closing) + $5 (shipping) = $65.29
Minimum budget calculation: Minimum budget = $500 (buffer amount) + (number of units * total cost per unit)
To be comfortable and have room for error, consider buying at least 3-5 units initially; then we have: The minimum budget (for 3 units) is $500 + (3 * $65.29) = $696.87. (You can adjust the number of units purchased based on your comfort level as well as risk tolerance.)
This is a simplified example. In fact, to decide budget, you also need to factor in potential returns, damaged products, and additional research tools, or listing tool.
What we think about Amazon retail arbitrage fees: In short, while $500 is a good starting point, a more realistic minimum budget for Amazon arbitrage might be around $700-$1000.
Step 2: Setting up accounts and tools
Once you have a plan in place, it’s time to equip yourself with the necessary tools to navigate the world of Amazon retail arbitrage. We divide these tools into three categories:
- Amazon seller account
- Scanning apps
- Inventory management software
2.1. Create Amazon seller
There are two seller account options on Amazon, Individual and Professional:
- A Professional account costs $39.99 per month and is suitable if you plan to sell more than 40 items per month.
- An Individual account charges $0.99 per item sold and is better for those just starting out.
Choose an appropriate account type based on the size of your needs. Then, you need to complete your seller profile with accurate information. This information includes your business name, address, and tax information.
Plus, Amazon may require additional verification steps (submitting documents to confirm your identity and business information). So, ensure your business information and identity are accurate.
2.2. Download scanning apps
Scanning apps are essential tools for anyone getting started with Amazon retail arbitrage for beginners. They help you quickly assess whether a product is worth buying and make informed decisions. Below are some scanning apps that we’ve used and have good impressions of. Let’s check to find a suitable option for you!
- Free option:
- Amazon Seller App: This official app lets you scan barcodes to check product details, selling rank, and estimated Fulfillment By Amazon (FBA) fees. It’s a great starting point, especially for its affordability.
- Paid options:
- Profit Bandit: This app offers a well-rounded feature set. These include sales rank, fee estimation, and competitor analysis. It can also help you identify potential for online promotions.
- Scoutify: Another strong contender, Scoutify boasts features like historical sales data, profit estimates, and sourcing suggestions.
- SellerAmp: This comprehensive suite offers a mobile app alongside a web app and Chrome extension. It goes beyond scanning, providing inventory management, listing creation, and analytics tools.
- ScanPower: This app focuses on providing quick and accurate product information retrieval. It integrates with other seller tools for a smoother workflow.
2.3. Set up inventory management software
When doing Amazon retail arbitrage, effective inventory management is crucial to avoid overstocking or running out of products. Inventory management software helps you keep track of your stock levels, sales, and reordering needs.
Below are some best choices that have been verified by LitCommerce:
- Amazon listing tool: This tool can maintain consistent inventory levels across your online store and Amazon marketplace. This eliminates the risk of overselling and ensures customer satisfaction. This is an ideal choice for those doing retail arbitrage on both Amazon and other platforms.
- InventoryLab: This software offers comprehensive inventory management, listing creation, and accounting features. It integrates with Amazon to streamline your operations.
- SkuVault: It provides detailed inventory tracking and warehouse management features, helping you keep your operations organized and efficient.
- SkuRush: This tool offers cloud-based inventory management specifically designed for Amazon FBA sellers. It helps with listing creation, order fulfillment, and inventory reconciliation.
- Zoho Inventory: It offers a free plan for small businesses, allowing you to track inventory levels, manage purchase orders, and generate reports.
Simplify Inventory Management with Amazon Listing Tool
Optimize your Amazon selling experience with LitCommerce, the trusted solution for inventory management and bulk listing. List your items now and watch your sales skyrocket!
Step 3: Finding products
You have prepared very carefully for your Amazon retail arbitrage both in terms of tools and knowledge. Now, is the golden time to hit the ground running and source profitable products! Here are some effective strategies to find deals:
- Visit local stores
- Find online deals and discounts
- Consider thrift stores and garage sales
3.1. Visit local stores

Local stores are excellent places to start your Amazon retail arbitrage product search. Big box retailers, discount stores, and clearance sections can yield high-profit items:
- Retail arbitrage staples: Brick-and-mortar stores like Walmart, Target, TJ Maxx, Marshalls, and Ross Dress for Less are popular hunting grounds for retail arbitrageurs. These stores offer clearance sections, seasonal discounts, and weekly sales that can provide opportunities to find deep discounts.
- Discount stores: Dollar General, Dollar Tree, and Five Below can be good sources for low-cost, high-volume items that can generate profits with the right margins.
- Department Stores: Kohl’s, Macy’s, and JCPenney often have clearance events with significant markdowns. However, you need to be selective with clothing items and ensure they are within Amazon’s clothing category guidelines.
- Big Box Stores: Stores like Costco and Sam’s Club can be a good source for bulk items that can be resold individually on Amazon for a profit. However, factor in the cost of splitting bulk packages and ensure the per-unit profit margin is worthwhile after factoring in Amazon fees.
Additionally, when looking for Amazon retail arbitrage items at local stores, don’t ignore the following tips:
- Use your scanning app religiously to quickly identify potential deals.
- Don’t be afraid to negotiate with store managers, especially for clearance items.
- Align your shopping trips with store flyers and online advertisements to target specific sales and clearance events.
3.2. Find online deals and discounts
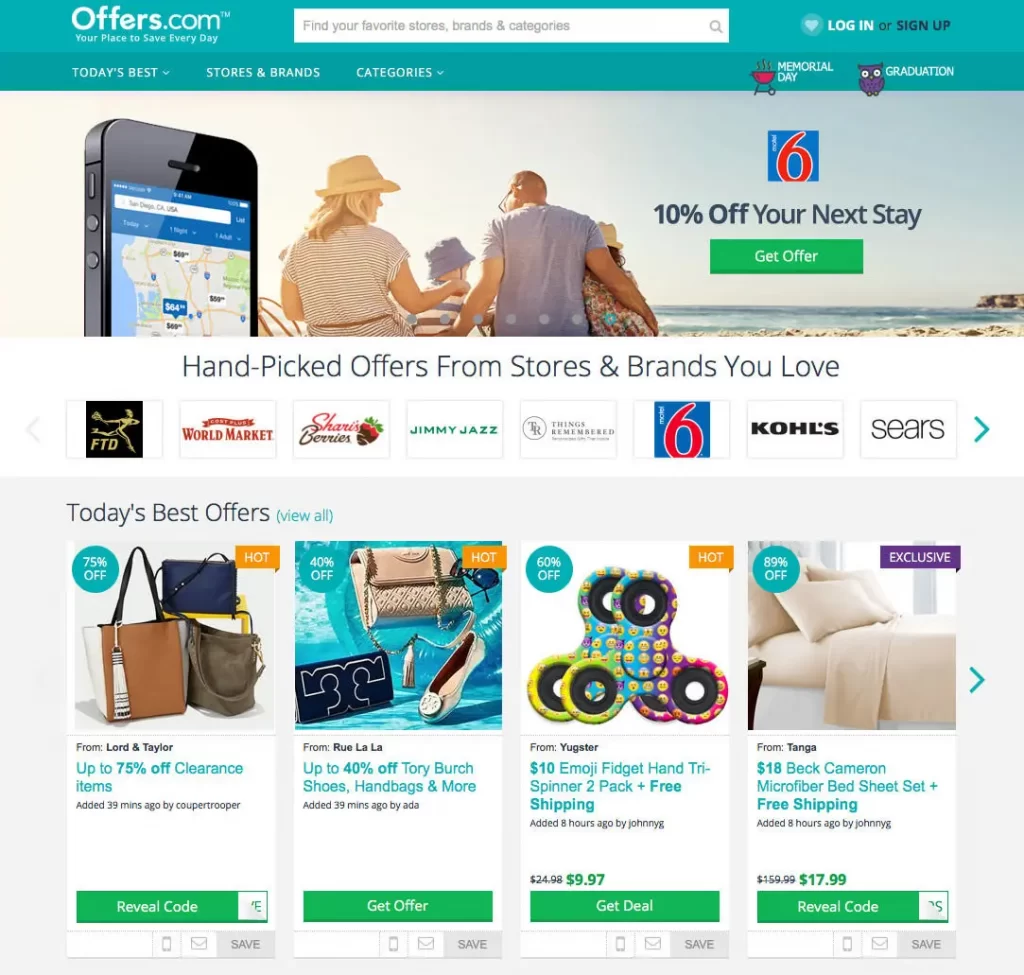
Online platforms can be a goldmine for finding Amazon retail arbitrage products at discounted prices. Here are some suggestions for you:
- Online retailers: Websites like eBay, Overstock, and Jet offer significant discounts on various products. Use filters to find the best deals.
- Daily deal sites: Websites like Groupon, Woot, and Slickdeals feature daily deals and flash sales on a wide range of products. These can provide excellent arbitrage opportunities.
- Coupon websites: Websites like RetailMeNot and Honey provide coupons and cashback offers, helping you save more on your purchases.
- Amazon deals: Don’t forget to check Amazon itself for deals. The Amazon Warehouse offers returned and refurbished items at lower prices, which can be resold for a profit.
Important: When sourcing from online retailers, you need to factor in shipping costs. It is vital to ensure the final landed cost allows for a healthy profit margin after Amazon fees.
3.3. Consider thrift stores and garage sales

Thrift stores and garage sales can be unconventional but lucrative sources for Amazon retail arbitrage:
- Thrift stores: Goodwill, Salvation Army, and other thrift stores sell secondhand items at low prices. You should look for brand-name clothing, electronics, and unique items that can be resold.
- Garage sales: It is a great idea to visit local garage sales and estate sales. These events can have a wide variety of items at bargain prices. You can use apps like Yard Sale Treasure Map to find sales in your area.
Remember: When sourcing from thrift stores and garage sales, prioritize items in good condition that meet Amazon’s listing guidelines. Damaged or incomplete products can lead to wasted time and money.
Step 4: Analyzing and purchasing
The next step in the Amazon arbitrage step-by-step guide is to analyze it further before making a purchase. Here’s a breakdown of the key actions:
- Scan products
- Check restrictions
- Evaluate condition
- Purchase items
4.1. Scan products

You should use your scanning app to gather essential information about the product. This information can include:
- Current selling price on Amazon: This helps determine your potential profit margin after factoring in Amazon fees and fulfillment costs.
- Sales rank: Ideally, aim for products with a good sales rank (generally under 100,000), which indicates healthy demand.
- Estimated profit: Most scanning apps (as we mentioned above) provide an estimated profit based on the selling price, Amazon fees, and your chosen fulfillment method (FBA or FBM). However, you shouldn’t solely rely on the estimated profit figures provided by scanning apps. It is important to factor in additional costs like shipping supplies and potential returns when calculating your final profit margin.
4.2. Check restrictions
Amazon has various restrictions on what can be sold and who can sell certain products. That’s why check restrictions are a step that cannot be missed when learning how to do Amazon arbitrage:
There are 3 aspects of restriction that you need to check:
- Restricted categories: Some categories, like beauty, health, and groceries, require approval to sell. Check Amazon’s guidelines to see if you need approval.
- Brand restrictions: Many brands are gated, meaning only authorized sellers can list their products. Check for any brand restrictions before purchasing.
- Product restrictions: Certain products, such as hazardous materials or items requiring special handling, may be restricted. Ensure you comply with all Amazon regulations.
4.3. Evaluate product conditions
Evaluating the condition of products, especially used or open-box items, is crucial when entering Amazon retail arbitrage business. There are the following 3 cases:
- For new products: You need to ensure they are in their original packaging, undamaged and include all accessories.
- For used products: It is important to check for any wear and tear. You should ensure they function correctly and are clean. Provide accurate descriptions when listing these items on Amazon.
- For refurbished items: If buying refurbished items, please verify that they meet Amazon’s standards for refurbished products. These include any warranties or guarantees offered by the manufacturer.
4.4. Purchase items

Once you’ve confirmed the product’s profitability, restrictions, and condition, it’s time to make the purchase. Here are some additional tips:
- Use coupons and discounts: Always leverage available coupons, store loyalty programs, and discount codes to maximize your profit margins.
- Buy in bulk (if applicable): If you find a great deal on an item and it allows for bulk purchases without compromising storage space, consider buying extras. This can help reduce your per-unit cost and increase profit margins.
- Keep receipts: You should maintain proper records of your purchases. These include receipts and invoices. These will be helpful for tax purposes and managing your inventory.
Step 5: Listing products
Once you have sourced your products, you can continue your how-to-do Amazon arbitrage journey by listing them on the platform.
But, at first, we note that creating effective listings and setting the right prices are crucial for attracting buyers and maximizing profits.
5.1. Create listings
Creating product listings on Amazon is straightforward but requires attention to detail to ensure your products are presented in the best possible light.
This Amazon retail arbitrage for beginners guide outlines two methods for listing products:
Method 1: Quick listing for small inventories (Amazon Seller)
Ideal for: A small number of products and a fast turnaround.
Here is how to use the Amazon Seller app for listing:
- Download and open the app: Log in with your seller account.
- Add a product: Scan the barcode or enter the ISBN.
- Fill in details: Add product condition, price, quantity, and fulfillment options (Seller-Fulfilled or FBA).
- Optimize listing: Craft a compelling title, informative description, and relevant keywords for better search ranking.
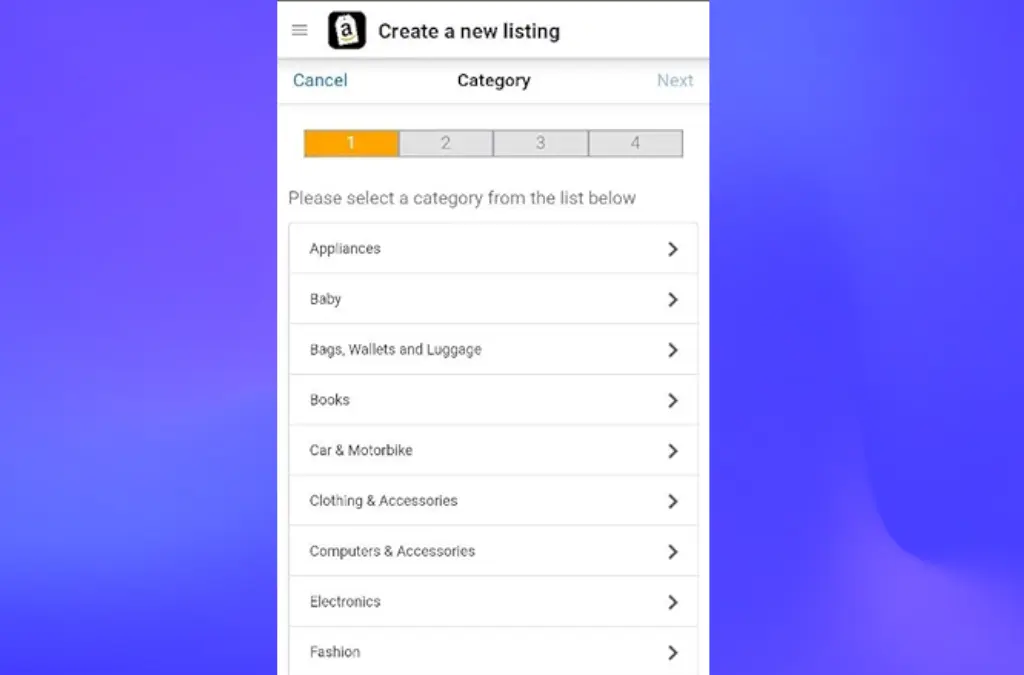
- Review and publish: Double-check everything before making your listing live.
Handy tips: Learn more about the quick listing in the article How to resell on Amazon.
Method 2: Efficient listing for large inventories (Seller Central)
Ideal for: Managing a large number of products and bulk uploads. Also, this method is more efficient for Amazon retail arbitrage.
Here is how to list retail arbitrage products on Seller Central:
- Access Seller Central: Log in to your account on a desktop/laptop.
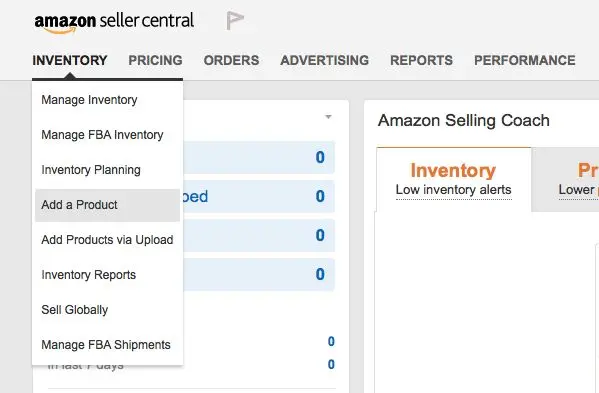
- Add products via upload: Go to Inventory and choose Add Products via Upload.
- Download template: Get a pre-formatted spreadsheet from Amazon.
- Enter product information in bulk: For all your products, fill in details like product name, condition, price, quantity, etc.
- Optimize listings in bulk: Write compelling titles and descriptions and use relevant keywords (like in method 1).
- Upload spreadsheet: Save and upload the completed spreadsheet. Amazon will create listings for each product.
- Review and monitor: Double-check listings for accuracy and monitor inventory levels. However, when you list in bulk, monitoring may be difficult. Then, you should consider utilizing LitCommerce.
Struggling to list products in bulk?
Effortlessly manage large-scale listings with LitCommerce’s precision tools. Simplify and enhance your bulk listing process like never before.
5.2. Decide price
When starting with Amazon arbitrage for beginners, setting the right price for your Amazon retail arbitrage products is critical for competitive advantage and profitability. So, how to set the right price? Let’s consider some key points
- Research competitors: You should check the prices of similar products on Amazon. Use tools like Scoutify, Profit Bandit, etc (as we stated above) to see historical price data and trends.
- Consider costs: Factor in all costs, including the purchase price, Amazon fees, shipping costs, and any other expenses. Once again, it is important to ensure that your selling price covers these costs and leaves room for profit.
- Dynamic pricing: You can consider using dynamic pricing tools that automatically adjust your prices based on competitor pricing, demand, and other factors. Tools like RepricerExpress, Bqool .. can help you stay competitive without constant manual adjustments.
- Psychological pricing: It is an excellent idea to use pricing strategies such as setting prices ending in .99 or .95.
Step 6: Shipping and fulfilling
There are two main fulfillment options when starting your Amazon retail arbitrage for beginners business: Fulfillment by Amazon (FBA) and Fulfillment by merchant (FBM)
6.1. Use Amazon FBA
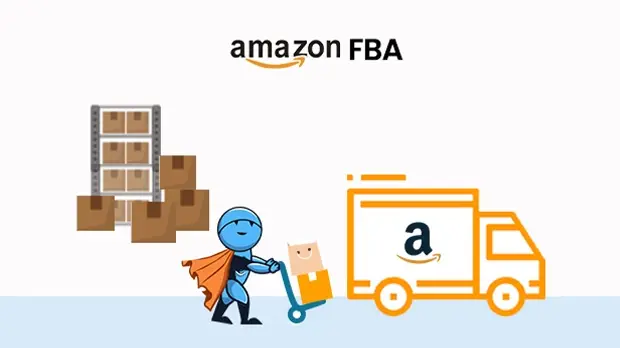
FBA allows Amazon to handle the storage, picking, packing, shipping, and customer service for your products. When using FBA services, you just need to prepare your products according to Amazon’s guidelines and ship them to Amazon’s fulfillment centers.
However, FBA comes with additional fees, including storage fees, fulfillment fees, and pick-and-pack fees. These fees can vary depending on product size, weight, and storage time.
So, FBA is a good option if you:
- Have a large inventory or limited storage space.
- Want a hands-off approach to fulfillment.
- Don’t mind factoring in FBA fees when calculating your profit margins.
6.2. Handle by yourself (FBM)
With FBM, you handle the storage, picking, packing, shipping, and customer service for your products. This option can be more cost-effective compared to FBA. However, you’re responsible for managing the entire fulfillment process.
You need to:
- Ensure you have a reliable process for packing and shipping orders promptly. You should use sturdy packaging to protect items during transit
- You are responsible for all customer service inquiries and returns. We highly recommend that you provide prompt and courteous responses to maintain a positive seller rating.
FBM is a good option if you:
- Have lower sales volumes
- Sell bulky or heavy items that would incur high FBA fees.
- Want more control over fulfillment costs?
- Are comfortable handling customer service inquiries and shipping logistics.”
Step 7: Managing finances and inventory
Effective financial and inventory management is a crucial step in the Amazon arbitrage for beginners guide. It’s the foundation for your business’s sustainability and growth.
7.1. Track expenses
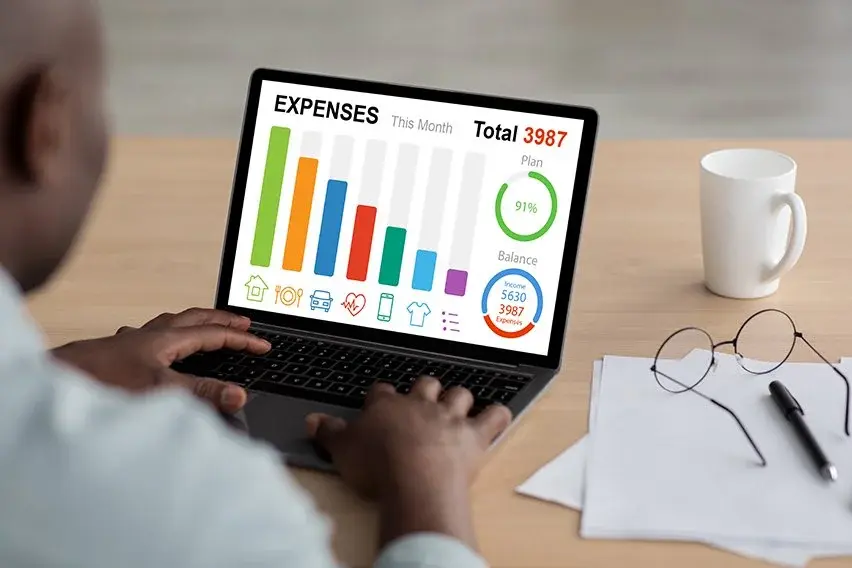
We highly recommend you use accounting software like QuickBooks or Xero to track your income and expenses automatically. These tools can integrate with Amazon and other platforms to streamline your bookkeeping.
Furthermore, you need to keep detailed records of all expenses, including product costs, shipping fees, Amazon fees, and any other business-related expenses.
Finally, it’s important to regularly review profit and loss statements to assess your business’s financial health. This will help you identify areas where you can cut costs or invest more resources in the Amazon arbitrage for beginners’ journey.
7.2. Monitor inventory
From the first steps, we have mentioned installing inventory management software such as LitCommerce Amazon listing tool, InventoryLab, SkuVault, etc. It’s time to use them to track your purchases, sales, and current stock levels.
In addition, there are some other tips related to inventory management that you should apply including:
- Prevent overstocking: You should avoid buying too much inventory upfront. Let’s start small and scale up as your business grows and you gain experience selling on Amazon.
- Regular inventory checks: It is important to conduct regular inventory checks to ensure your records match the actual stock you have on hand. This helps prevent overselling and potential order fulfillment issues.
Step 8: Providing excellent service and handling return
We are coming to the final step of the “How to start Amazon arbitrage” guide. It offers excellent service. Of course, whether you choose retail arbitrage or any model to do business, great excellent services are a must-have to retain customers.
Here’s how to provide excellent customer service and manage returns effectively:
8.1. Clear return policy

Firstly, you need to have a clear and easy-to-understand return policy displayed on your listings. Let’s focus on key details like:
- Return window: Specify the timeframe within which customers must initiate a return (e.g., 30 days from purchase).
- Accepted return conditions: Outline which items qualify for return (e.g., unopened, undamaged items with original tags). Consider offering a grace period for damaged items due to shipping.
- Return process: Detail the steps a customer needs to take to initiate a return, including where to find the return label (if applicable) and how to contact you for questions.
8.2. Respond promptly
To ensure the response happens as quickly as possible, you need to consider some practices:
- 24-hour response time: Set a goal to answer all customer inquiries and messages within 24 hours, even on weekends. This demonstrates your commitment to their needs and builds trust.
- Proactive communication: Don’t wait for customers to reach out. If there are potential delays or issues with their order, proactively send an update to manage their expectations.
- Multiple channels: Offer various communication channels for customer convenience, such as email, phone support, and Amazon’s messaging system.
Benefits and Drawbacks of Amazon Retail Arbitrage for Beginners
Amazon retail arbitrage offers unique opportunities for entrepreneurs, but it also comes with its own set of challenges and risks.
Benefits of Amazon retail arbitrage
Amazon retail arbitrage can be a tempting way to jumpstart your online selling journey, especially for beginners. Here are some of the key advantages that make it attractive:
- Low startup costs: Compared to other online business models, retail arbitrage requires minimal upfront investment. You don’t need to manufacture your own products, design a website, or invest in extensive marketing campaigns. You can start small, source products from local stores, and sell them on Amazon with minimal overhead costs.
- Low startup costs: Compared to other online business models, retail arbitrage requires minimal upfront investment. You don’t need to manufacture your own products, design a website, or invest in extensive marketing campaigns. You can start small, source products from local stores, and sell them on Amazon with minimal overhead costs.
- Quick start-up time: If you already have some experience finding deals and understanding online marketplaces like Amazon, you can launch your retail arbitrage business relatively quickly. There’s no need for lengthy product development or complex website creation. You can source products, create listings, and start selling within a short timeframe.
- Scalability: Retail arbitrage offers the potential to scale your business gradually as you gain experience and profits grow. You can start by selling a few items and then reinvest your earnings into sourcing more inventory and expanding your product selection.
The downside of Amazon retail arbitrage
While Amazon retail arbitrage for beginners offers a beginner-friendly entry point, there are some hurdles to consider:
- Competition: The Amazon marketplace is highly competitive, and retail arbitrage is a popular business model. You’ll be competing with other sellers for the same products, often leading to thin profit margins if you’re not strategic in your sourcing and pricing.
- Time commitment: Finding profitable deals requires time and effort. You’ll need to dedicate time to researching products, visiting stores, scanning items, and managing your inventory. Success often hinges on putting in the hours to source deals and optimize your listings.
- Limited profit margins: With high competition, it can be challenging to find products with significant profit margins after factoring in Amazon fees, shipping costs, and other expenses. Careful sourcing, cost-control measures, and strategic pricing are essential to ensure profitability.
Case Studies of Amazon Retail Arbitrage Business
Nate and Alysha Jackson started their Amazon FBA retail arbitrage business with a $100 investment. Within a year, they achieved over $180,000 in sales, and to date, they have sold over $1 million worth of products on Amazon. Their business model involves buying items at low prices locally or online and reselling them at a profit on Amazon.
Here’s what made them successful:
- Focus on clothing, particularly bras, as they are not a “gated” category and have less competition.
- Source inventory primarily from Kohl’s, utilizing multiple layers of discounts to maximize profit.
- Use tools like TacticalArbitrage, Scoutify 2, InventoryLab, and Keepa to streamline sourcing and inventory management.
- Adopt a broad approach to inventory, buying small quantities of many different items to minimize risk.
- Train and hire helpers, including friends and family, to scale their business, even if some eventually start their own ventures.
From what we witnessed, Nate and Alysha’s success story highlights the potential of Amazon FBA retail arbitrage for beginners.
Curious about more methods to make money on Amazon, this article unveils 16+ proven and practical ways to kickstart your Amazon money-making journey.
Amazon Retail Arbitrage: FAQs
Yes, Amazon arbitrage can be profitable if done correctly. It involves buying products at low prices from various sources and reselling them at higher prices on Amazon. Key factors for profitability include effective sourcing, competitive pricing, understanding Amazon’s fees, and efficient inventory management. Yes, Amazon arbitrage is legal. It involves purchasing products at lower prices from retail stores or online and reselling them on Amazon. However, sellers must comply with Amazon’s policies, including brand and category restrictions, to avoid issues like account suspension or product removal. The startup costs for Amazon arbitrage are relatively low. You can potentially begin with minimal upfront investment. Expenses include scanning apps (free or subscription-based), shipping supplies, and transportation costs. Focus on finding deals and optimizing your processes to maximize profits. Yes, you can resell retail products on Amazon, but with conditions. It’s called retail arbitrage. While legal, there are restrictions on certain brands and categories. You’ll need to ensure the products are new or like-new and meet Amazon’s listing guidelines to avoid account suspension. Amazon arbitrage and FBA are both ways to sell on Amazon, but they differ in what you’re selling and how. Arbitrage involves reselling existing products from stores or other online retailers at a profit. You find deals, buy low, and sell high on Amazon. FBA (Fulfillment by Amazon) is a broader term for using Amazon’s warehouses and services. You can do arbitrage with FBA, but FBA can also be used for private label selling, where you create your own brand and products.
Is Amazon Arbitrage Worth It?
Absolutely yes.
Amazon retail arbitrage can be a good way to start selling on this marketplace. It requires less upfront work than private label but finding profitable products and dealing with competition can be challenging. However, we think it’s worth considering if you’re willing to invest time in research and have some capital to buy inventory.
Furthermore, if you want to continuously update great tips on starting and growing your online business, don’t forget to follow our Amazon blogs. We always strive to bring you the highest-quality, most useful, and easiest-to-understand articles!

