Shopify is one of the popular eCommerce platforms that enables anyone to create and launch an online store. However, it might be overwhelming for newbies without a clear Shopify tutorial.
To make the path to a successful business, in this Shopify tutorial, LitCommerce – a multichannel selling solution – will walk you through 9 steps on how to use Shopify
Without further ado, let’s get this ball rolling!
No Hassle, Just Sales! Start Selling with Shopify Using LitCommerce |
Shopify Basics: At A Glance
Before getting into the main part of the Shopify tutorial, let’s learn what is Shopify, what are the pros and cons of Shopify and how does it work.
What is Shopify?
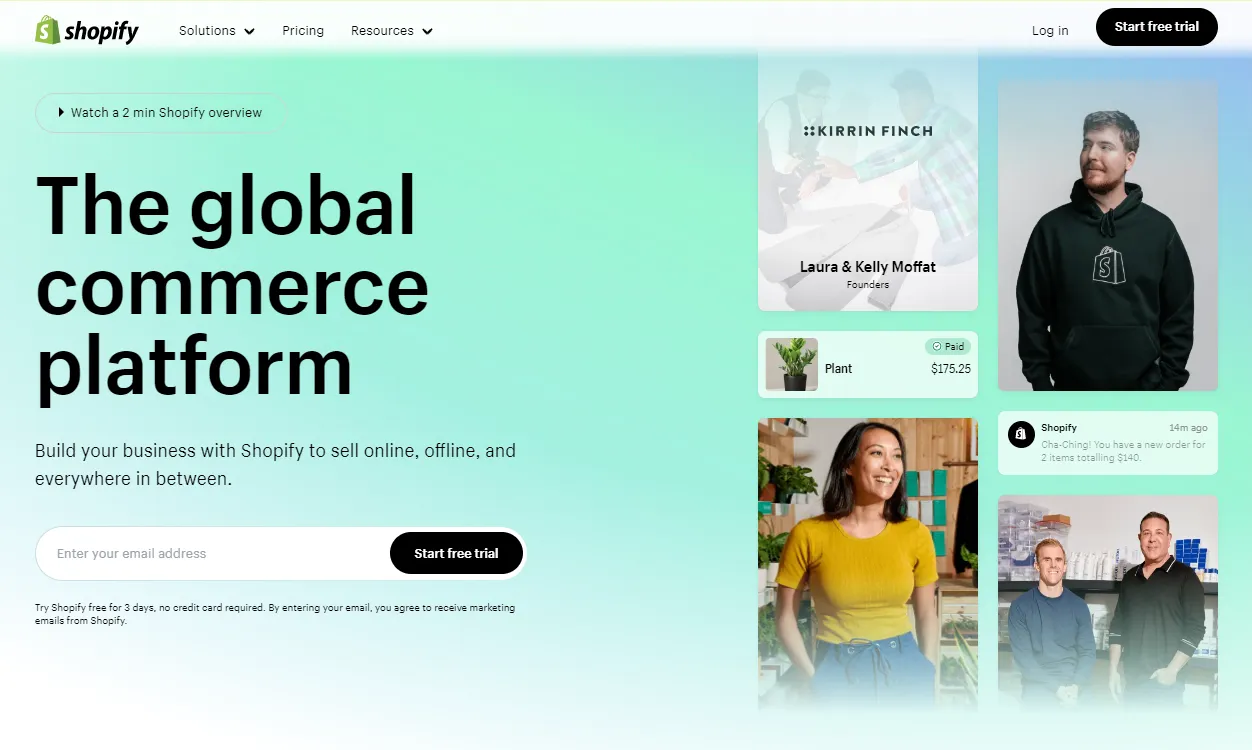
Regarding Shopify basics, the platform is a software-as-a-service (SaaS) firm that provides eCommerce solutions for merchants to sell everything online. Founded in 2004, Shopify has grown and become a leading platform, hosting over 4 million businesses across 175 countries.
Shopify is developed with several strengths to be a lucrative eCommerce platform for selling products online. Firstly, Shopify has a user-friendly interface for building and customizing online stores. Furthermore, the Shopify App Store is another outstanding strength of the platform, with 8000+ well-designed & mobile-friendly apps that are strictly assessed by the Shopify team. As a result, sellers can enhance the store’s capabilities without negatively impacting the store’s performance.
Moreover, the Shopify Themes Store offers over 120 free and paid themes that can be used to change the look of the online store to your heart’s content. These themes are also expertly created and optimized for mobile and desktop screens.
On top of that, Shopify’s extensive resources also help merchants succeed, such as Shopify Blog, Business Courses, Help & Support, and the seller’s community.
How much does it cost to build a Shopify store?
Shopify offers a range of pricing plans to suit different business needs and budgets. Overall, there are 3 plans ranging from $39/month to $399/month, including:
- Shopify Basic plan;
- Shopify;
- Advanced Shopify.
New sellers can take advantage of Shopify’s 3-day free trial to test any plan. After that, they can access the $1/month in 3 months promotion. Besides, store owners can save 25% more after 3 months with the annual package from Shopify.
However, in addition to the monthly subscription fees, there are extra selling fees to consider, such as transaction fees and fees for using third-party apps.
Overall, the cost of building a Shopify store can vary depending on the features and services you choose. Still, Shopify is generally considered an affordable option for businesses of all sizes. If you are not sure about that, you can take a look at some of the Shopify competitors to better compare in terms of pricing.
Shopify Tutorial: How To Use Shopify Effectively?
As mentioned above, Shopify makes everything simple for everyone to start building an online business. However, it might be a little bit overwhelming for a beginner. To help you avoid unnecessary steps, we will show you the fastest path to build a Shopify store.
If you prefer a visual Shopify tutorial, check out this video to quickly go through the whole process in just 10 minutes:
Step 1: Create a Shopify account
Initially, an account is required before setting up a Shopify store. Creating an account takes a minority effort, thanks to the comprehensive onboarding flow.
All you need to do is click the Start Free Trial button from the Shopify Homepage. By choosing to start, you can automatically claim the deal of $1/month for 3 months from Shopify after the 3-day free trial.
Next, the system might ask you several multiple-choice questions to understand more about you and your business, such as:
- Are you a beginner or an experienced seller?
- Where would you like to sell?
- What do you plan to sell first?
- What would you like to name your store?
- Where will your business be located?

You can skip the section and sign up for an account. There are 4 options to create a Shopify account using Email, Apple, Facebook, or Google. You can choose the option that suits you best, then the system will navigate you directly to the Shopify dashboard.
Step 2: Explore the Shopify dashboard
Once you finish the first step of creating a Shopify store and see the dashboard interface, it’s time to explore everything behind a selling website. In this step, we will show you the workspace so you can easily find where to navigate when you need to adjust something.
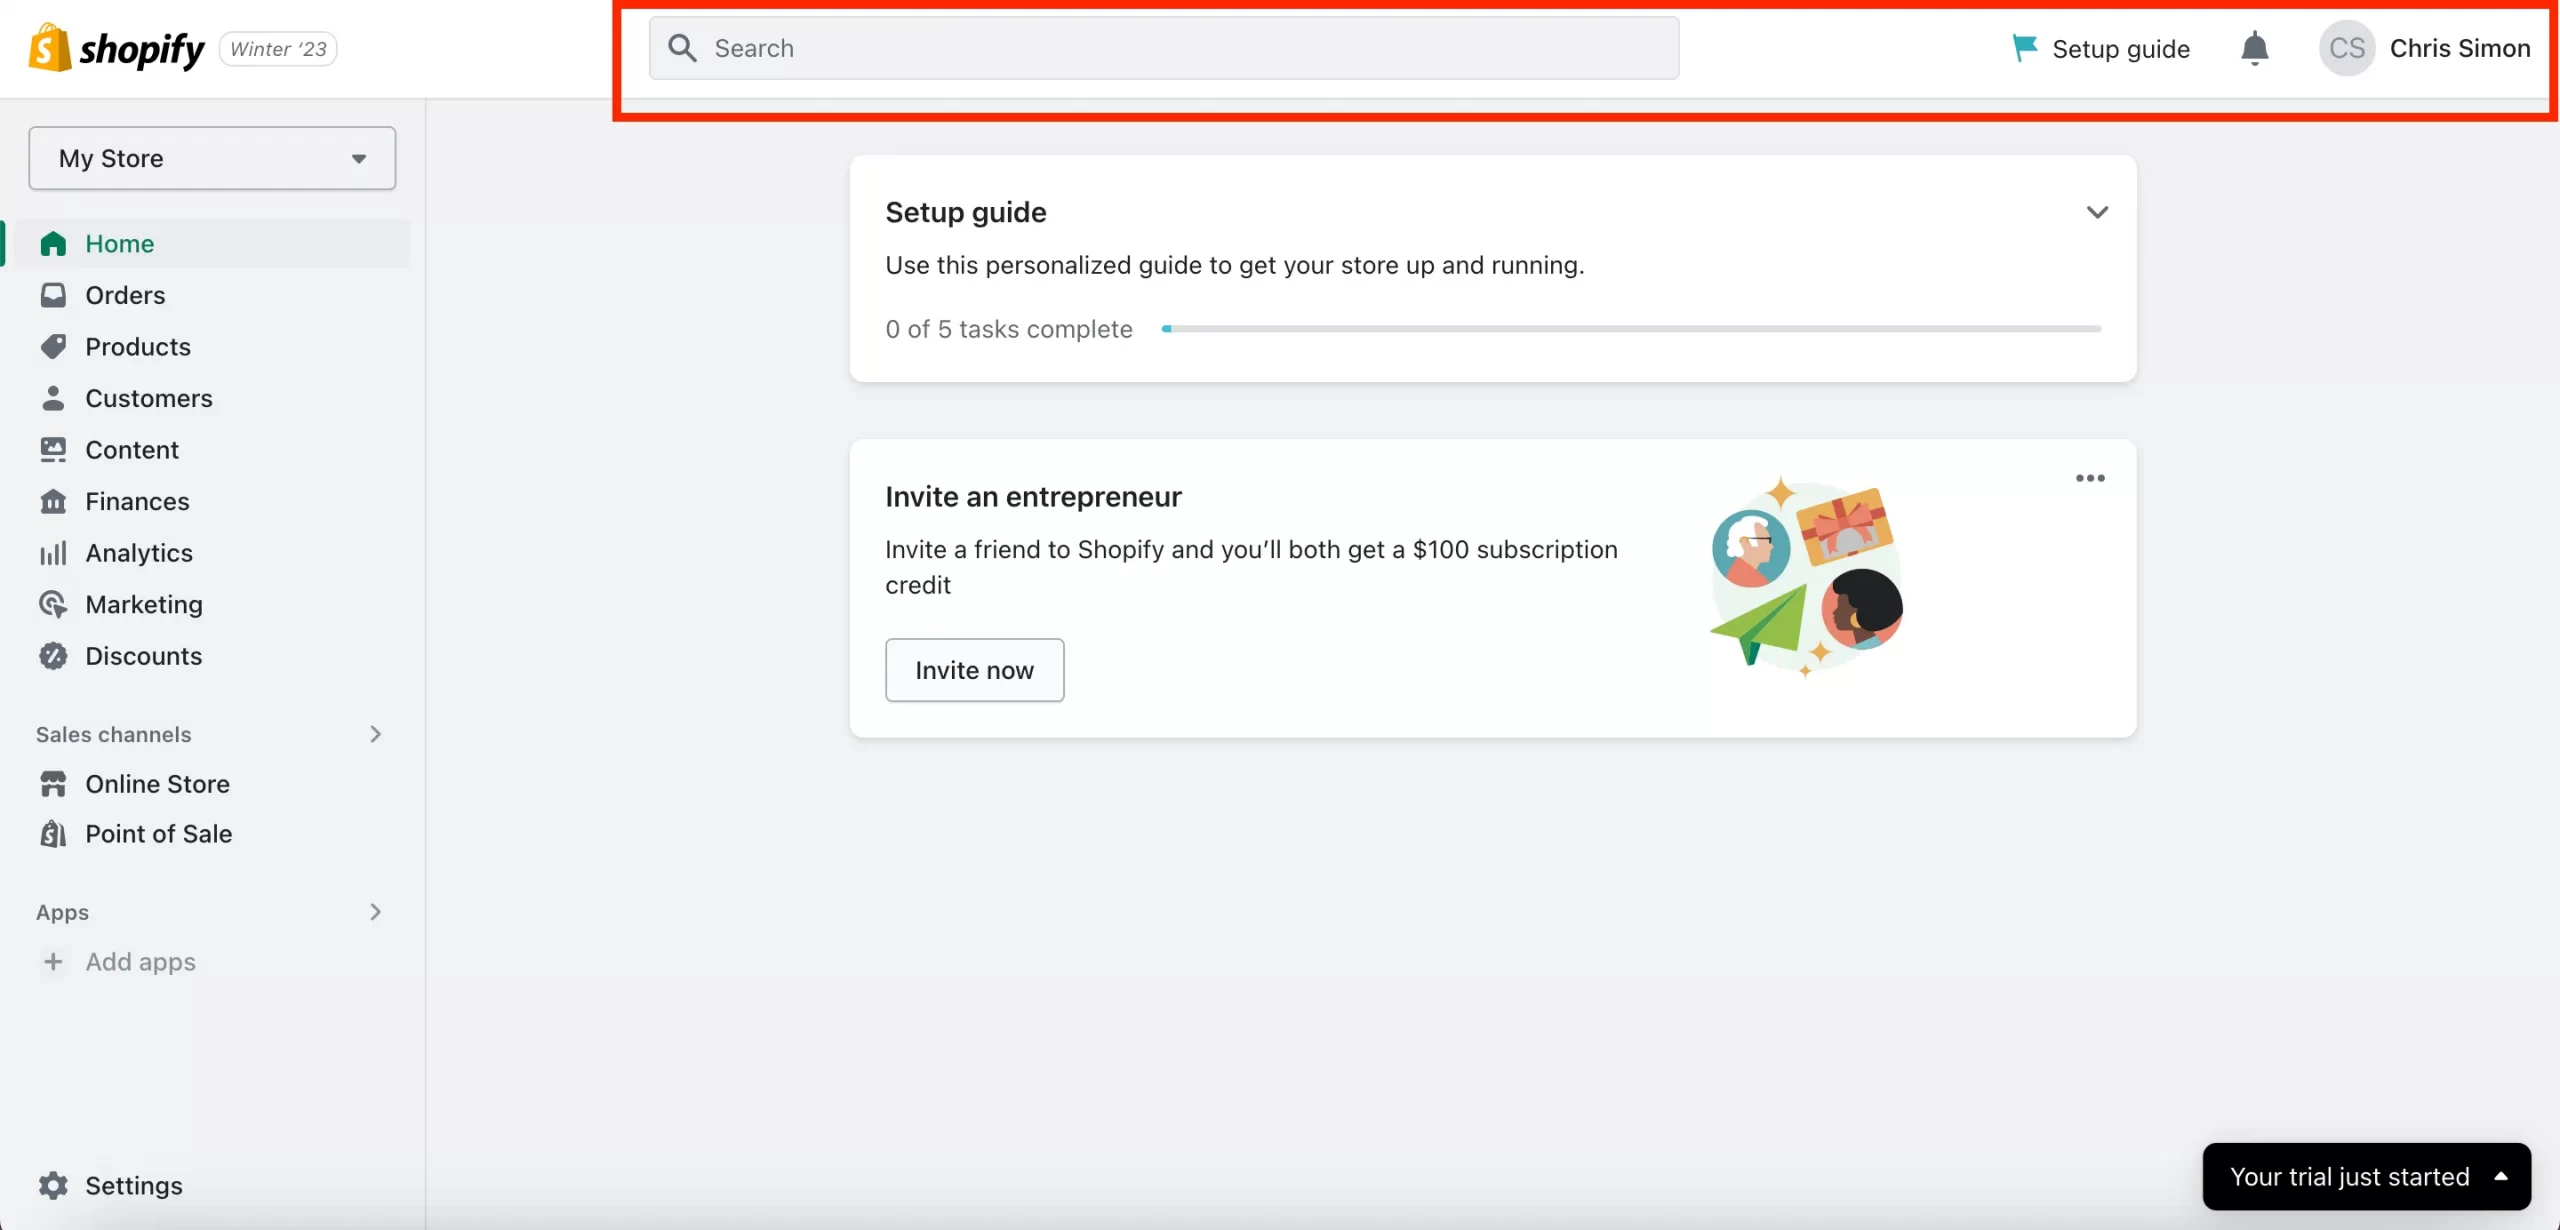
At the dashboard’s top is a search bar, a setup guide, a notification box, and the seller’s profile. This section is helpful for merchants to find a feature, control notifications, and adjust their profiles.
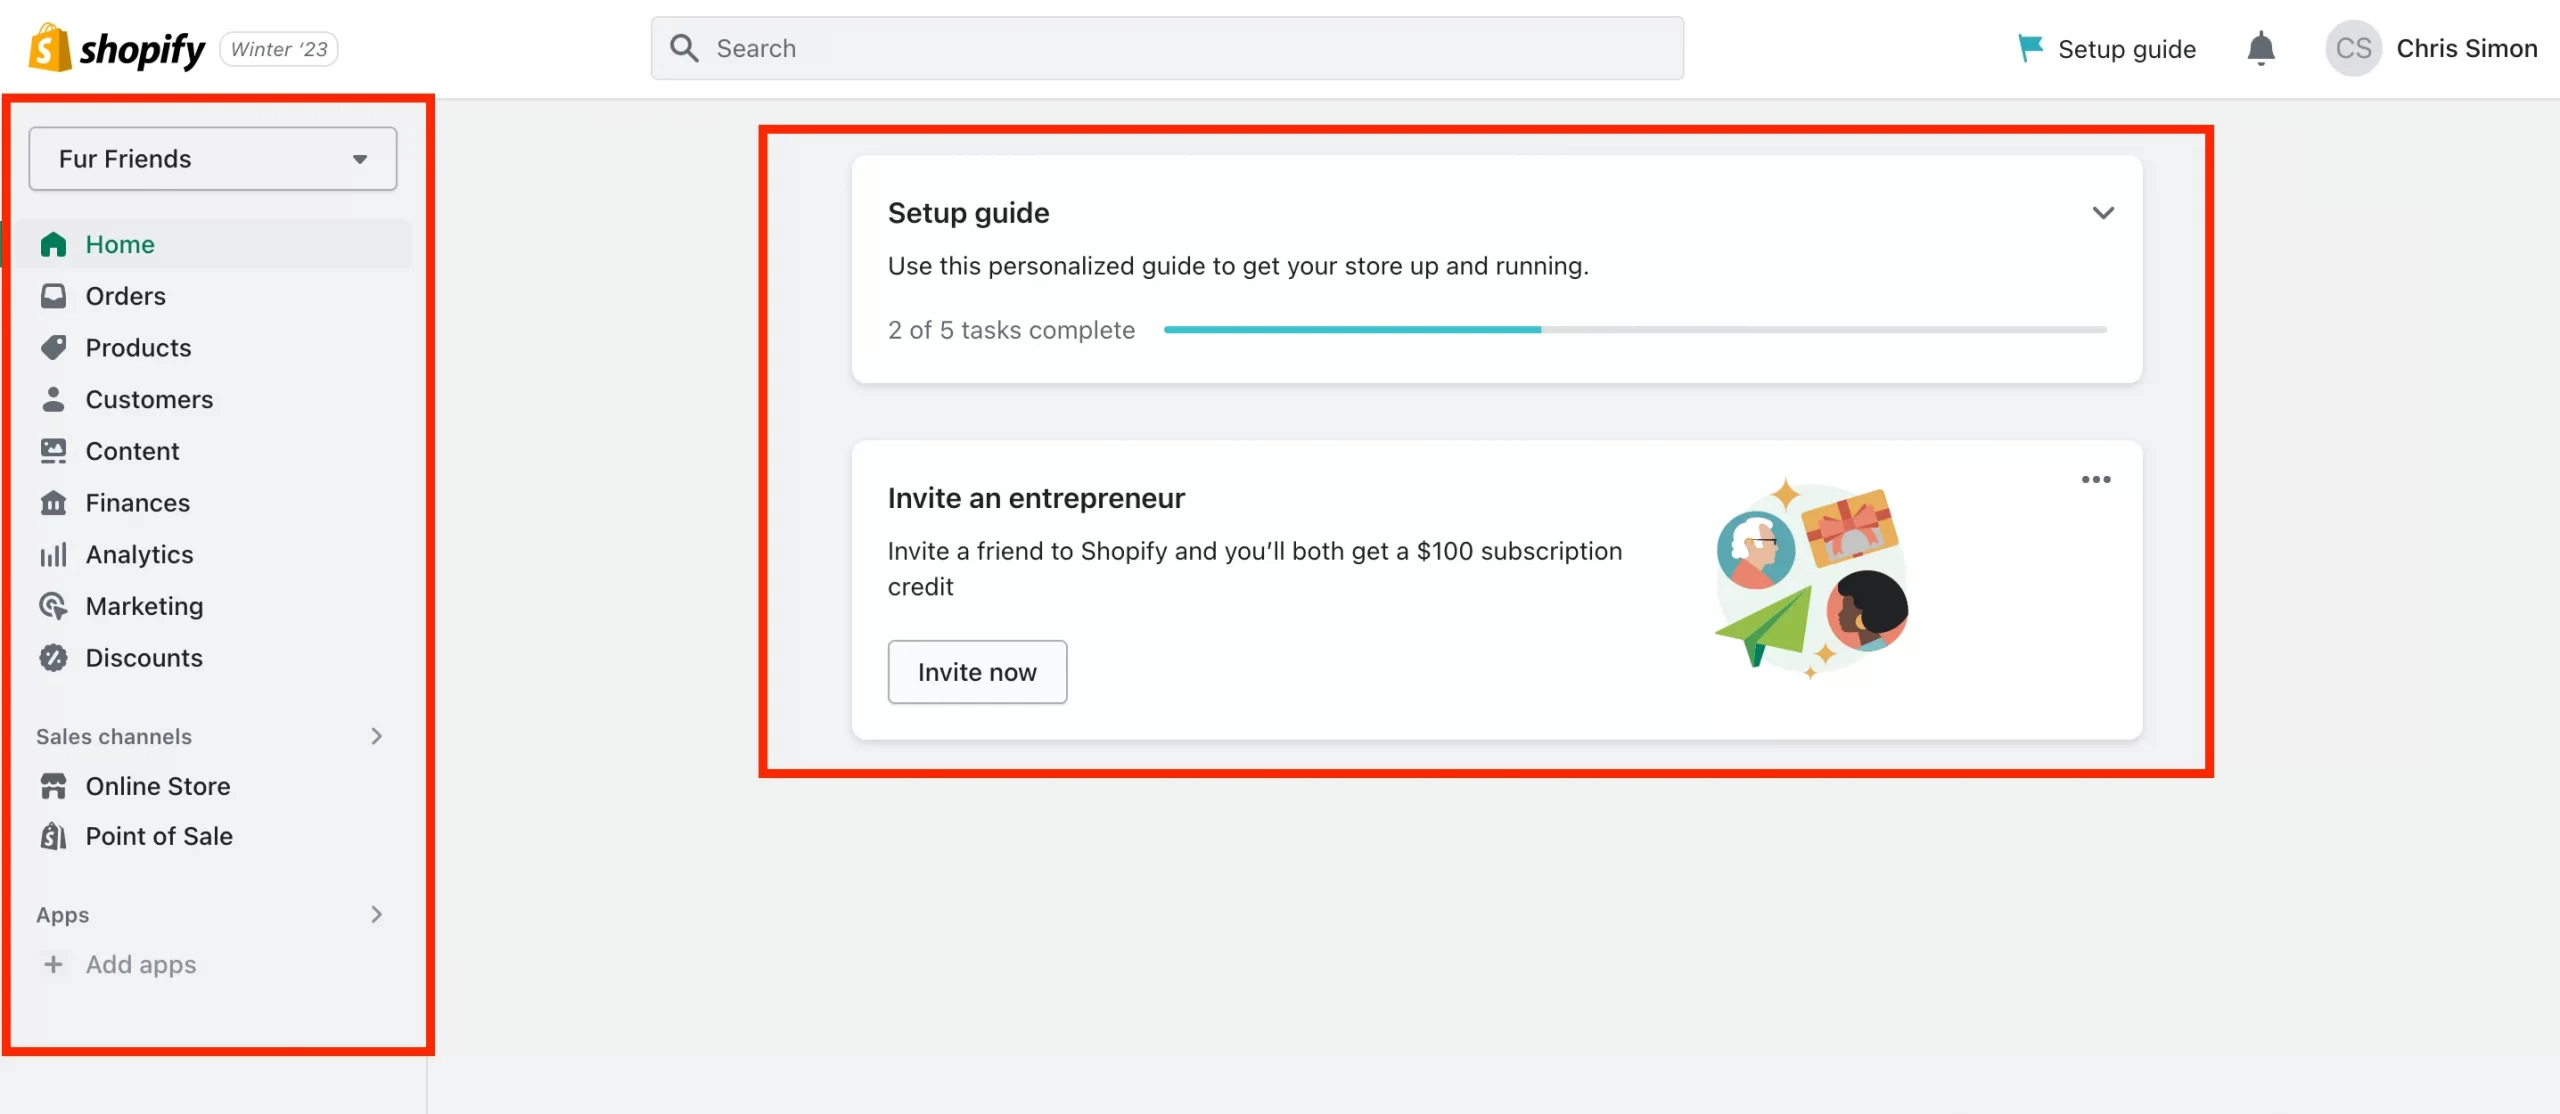
The remaining parts of the dashboard are the displaying window and the sidebar. The sidebar has adequate functions to develop and grow a store on Shopify for beginners, and when you select an option from the bar, a specific page will be shown in the central window.
Step 3: Add your first Shopify product
Moving to the following step, this Shopify tutorial will show you how to upload your items to the store. There are 2 standard methods: uploading each item at a time and bulk importing from CSV files.
To upload a single item, click on Products > Add your products from the sidebar.
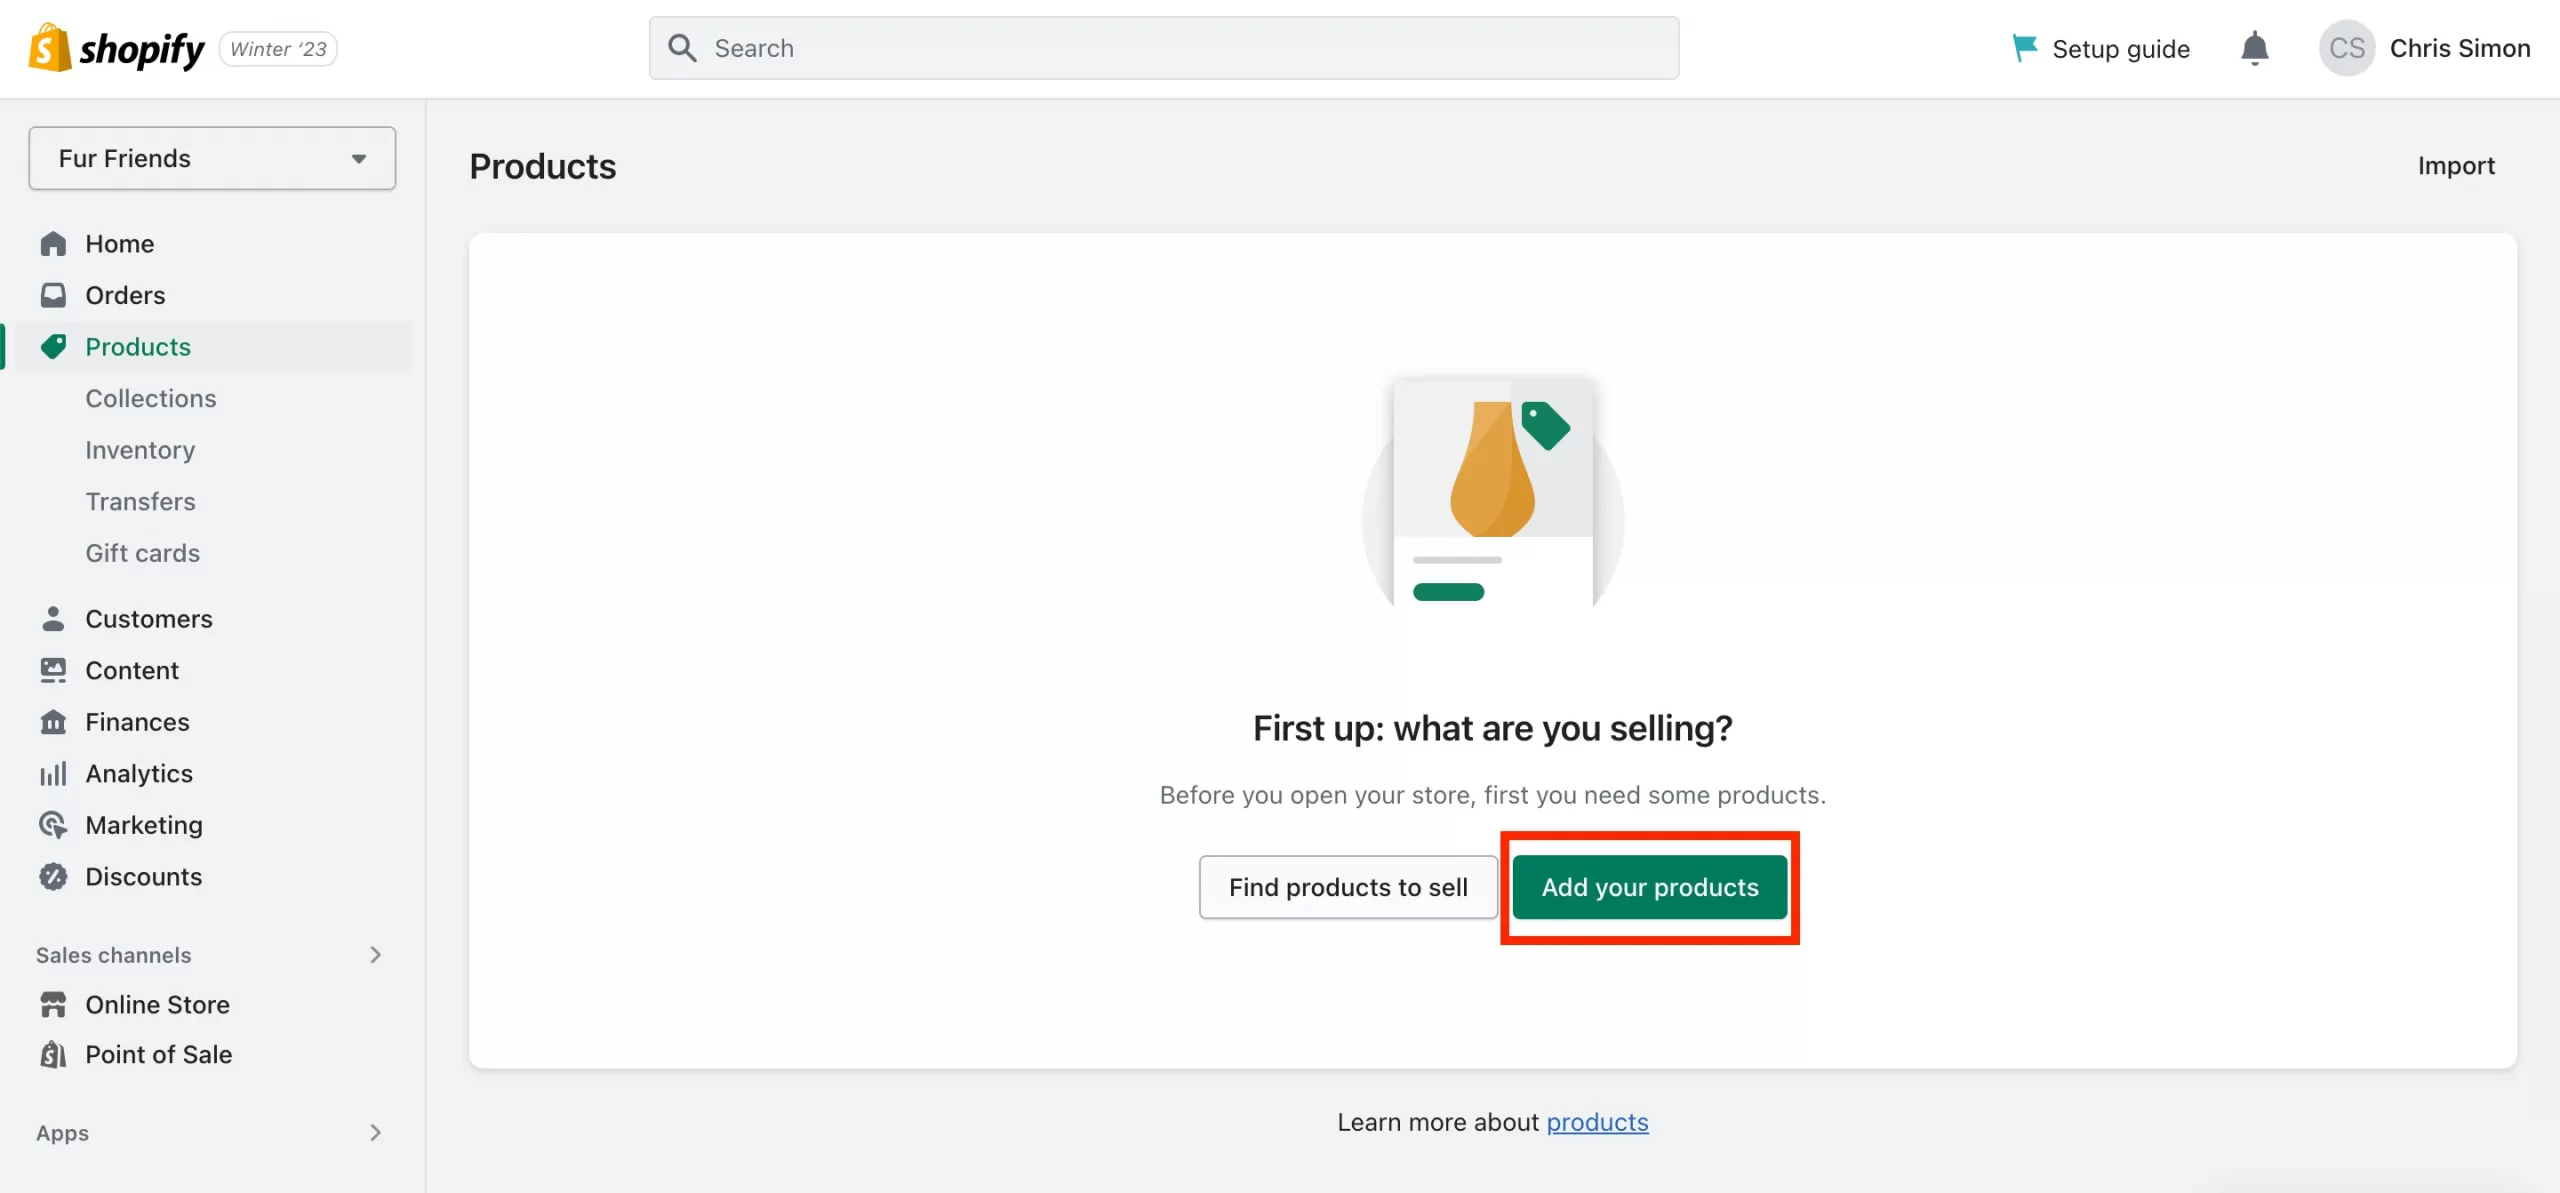
After that, the system will take you to the product page, where you can input the product’s attributes, such as:
- Title;
- Description;
- Media;
- Pricing;
- Inventory;
- Shipping;
- Variants;
- Product organization;
- Search engine listing.
When adding product information, you should also pay attention to Search Engine Optimization (SEO) for the title and description, which helps customers easily proceed with their search.
- Go to the Search engine listing section. Click on Edit to see how this product might appear in a search engine listing.

- From here, Shopify will ask you to fill in the Page title, Meta description, and URL.
- Initially, the descriptive title you enter will display among the search results. Then, you need to add the product description that includes the main keywords. The last thing is to modify and create a URL that matches the above information.
However, when building a Shopify store, uploading one-by-one will take a lot of time if you have many items. Importing products in bulk using CSV files can make the process faster.
Add Products to Shopify Faster with BulkFlow
Uploading products one by one can be slow. BulkFlow makes it easy to import, edit, and export your Shopify products in bulk using CSV, Excel, or Google Sheets!
Step 4: Name your Shopify store
When setting up Shopify stores, the name might be one of the most crucial elements. The store’s name will impress buyers at first glance, tell them about your business, and partly determine how your store stands out from others.
Don’t worry if you have yet to know what is the best option to name your Shopify store. This Shopify tutorial will suggest a checklist so you can lean on it and figure out what works best. A good name should:
- Be catchy, simple, memorable, and easy to spell or pronounce;
- Include a keyword;
- Generate a positive feeling;
- Be able to scale.
And here’s how you name your Shopify store within three simple steps.
- First, hover over the bottom of the left-hand sidebar, and click on Settings. A window will show up, then go to Store details > Profile.
- Choose Edit to change the default name, which is automatically given when you create an account. You can also edit the phone numbers, store contact email, and sender email in this section.
- Once you finish inputting the new name of your Shopify store, click on the Save button to make a change or Discard to cancel.

Step 5: Add a custom domain
A custom domain plays a vital part in establishing your business name, building trust online, and increasing the chances of sales. It is because a relatively easy-to-find domain name will approach potential customers better when they conduct a web search to find a product.
When you are at the stage of getting started with Shopify, your store will be assigned a domain name as myshopify.com. To make changes, you can add a custom domain. There are several ways to do so, including:
- Buy a domain;
- Modify the myshopify.com domain.
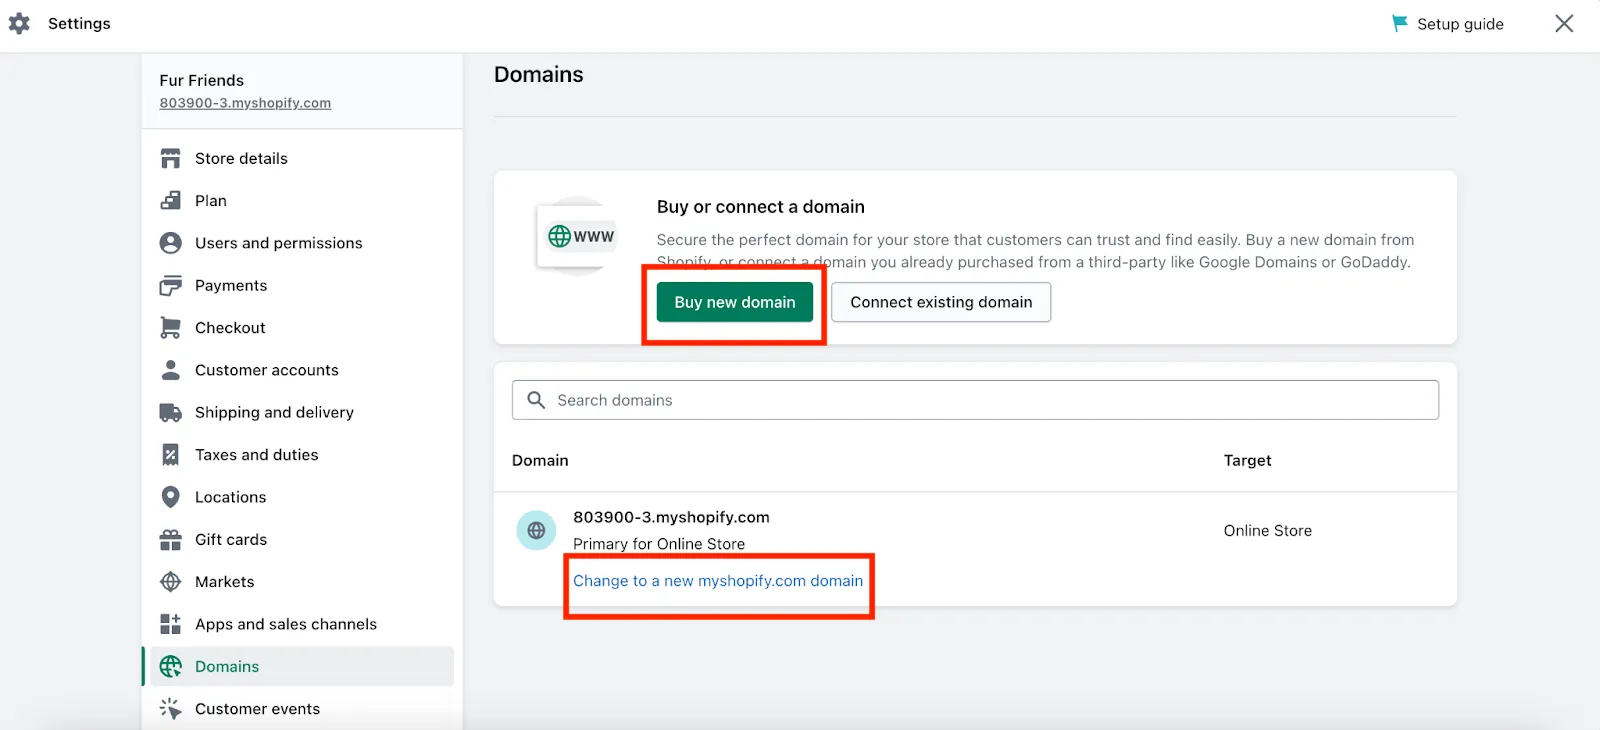
To edit or add a custom domain, navigate to Settings from the admin homepage. Then choose Domain from the sidebar to open the domain settings tab. From here, choose Buy new domain to get a brand new one for your store. If you are on a budget, you can change myshopify.com to yourstore.myshopify.com, with ‘yourstore’ as the phrase you wish to name your Shopify site.
If you want an instant domain name match that reflects your brand and makes it easier for customers to find you, buying a new domain is best. You can do this directly through Shopify or purchase one from a third-party domain provider and connect it to your Shopify store.
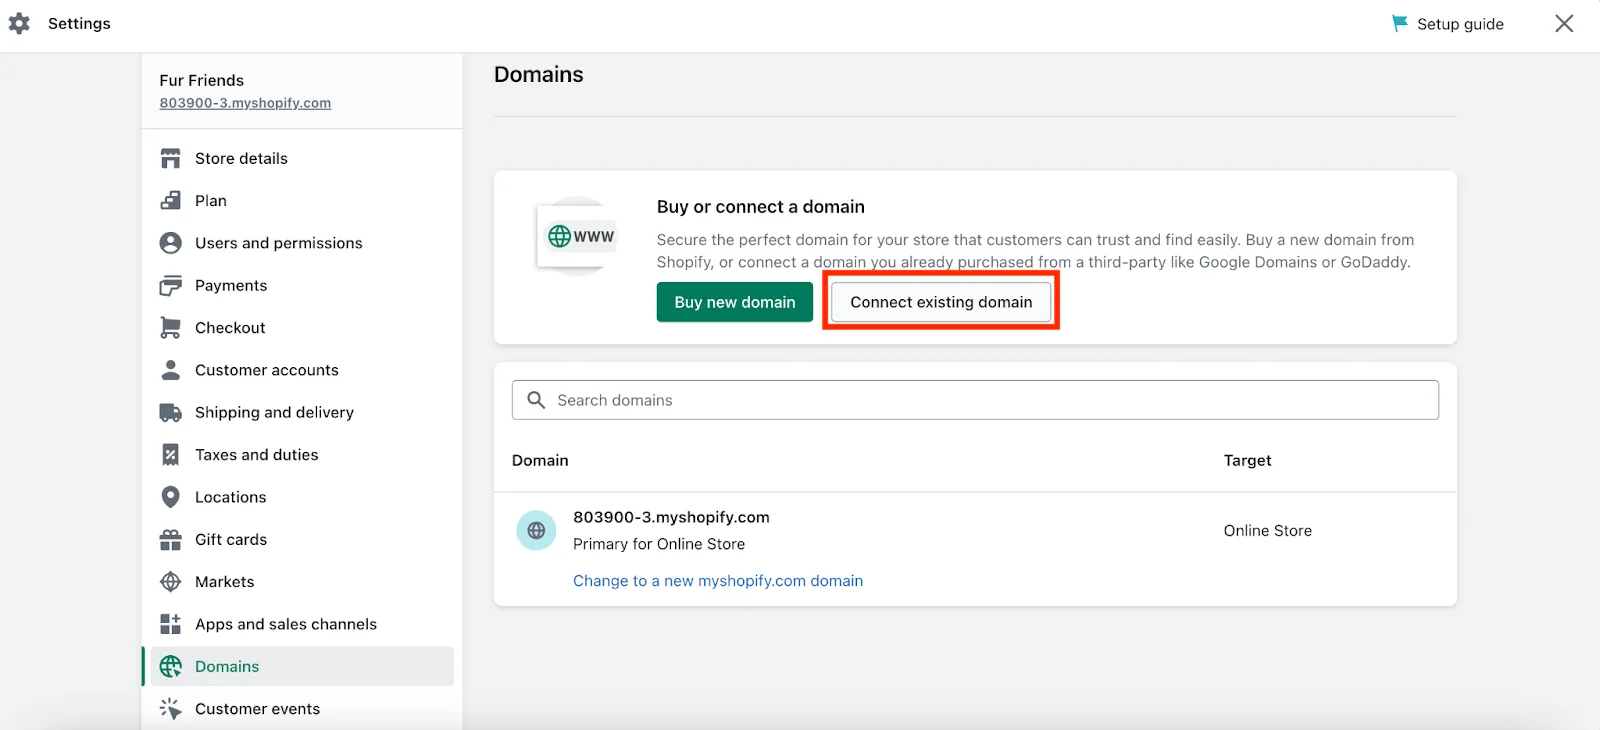
There’s another way to change the default domain to the one representing your brand better. Shopify lets you connect the existing domain to the newly created Shopify store. Go to the domain settings page to connect and press the Connect existing domain button.
Step 6: Choose a theme for your store
In the next step of how to set up a Shopify store, eCommerce merchants are expected to start designing the storefront. Using Shopify, this task can be done without any coding skills since the platform offers many themes for everyone to decorate their store.
On Shopify Theme Store are templates powered by Shopify or developed by third-party designers. Before purchasing, sellers should spend time visiting the demo store and getting feedback.
For beginners, choosing a free theme might be a better solution to save some money. Check out the best Shopify free themes for a new selling website!
Install a theme to your Shopify store
To install a theme, go to Shopify Theme Store. Shopify makes choosing a theme easier by offering several ways to find the best one for your business:
- If you want to narrow down the options based on your business characteristics, click Collections at the top of the page and select a category.
- Otherwise, you can explore all themes available in the store by choosing All Themes. To refine your results, use the filters on the sidebar menu.
When you find a theme that works best for your store, choose View demo store to see how a store looks like using the chosen theme. Scroll down to explore the theme’s features, reviews and support, and documentation.
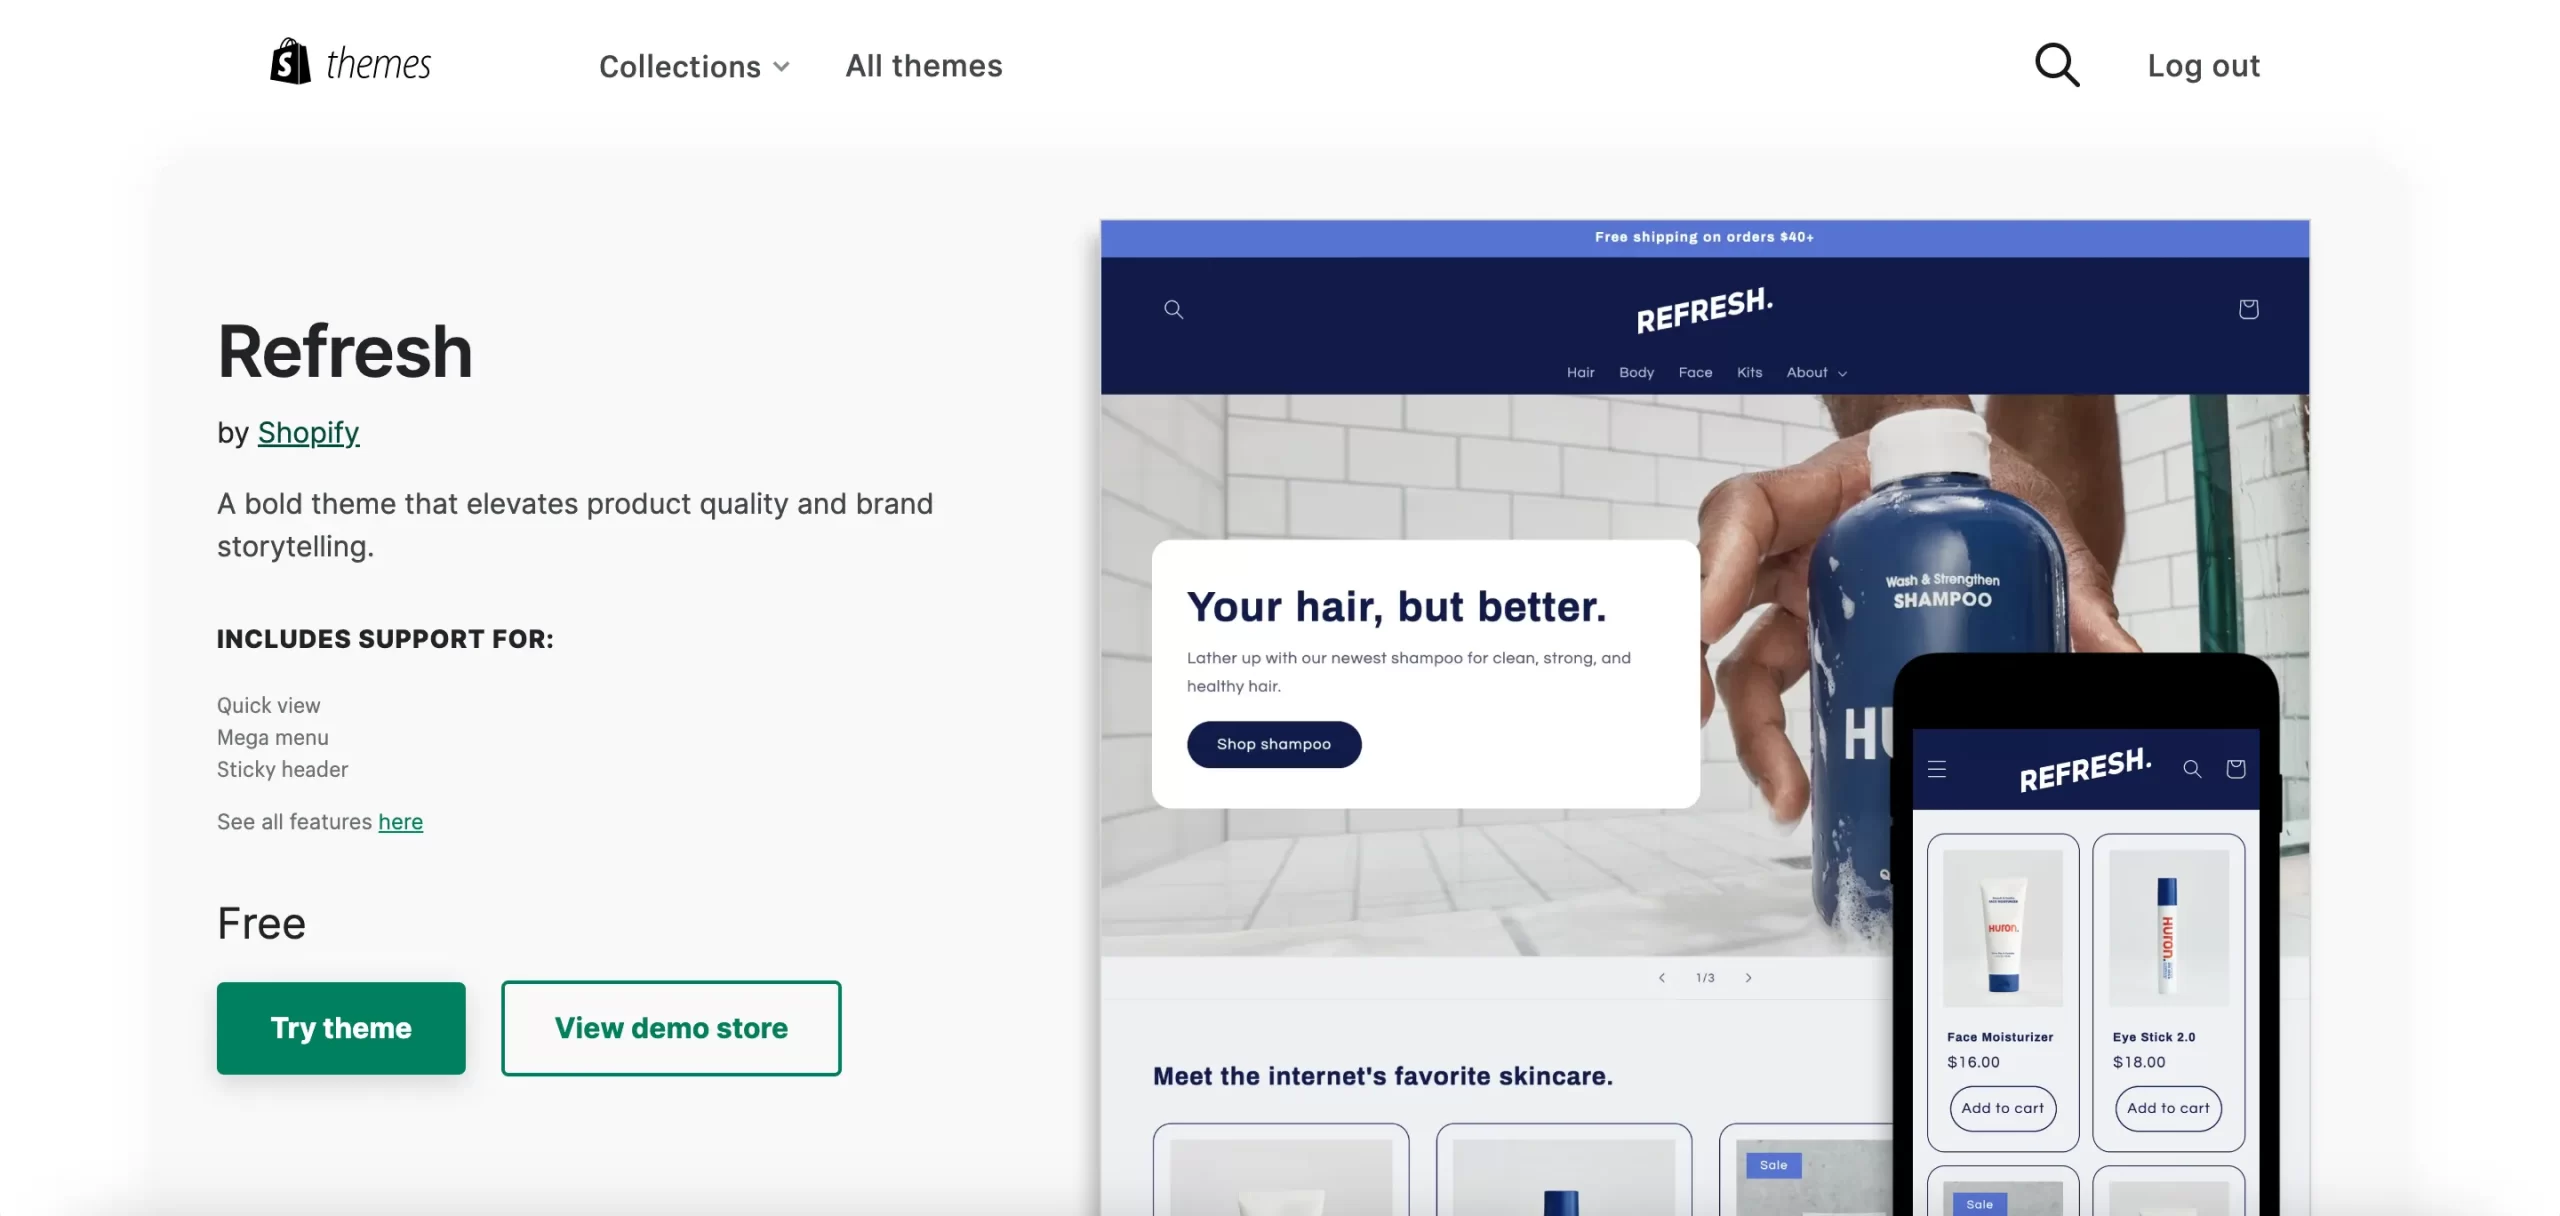
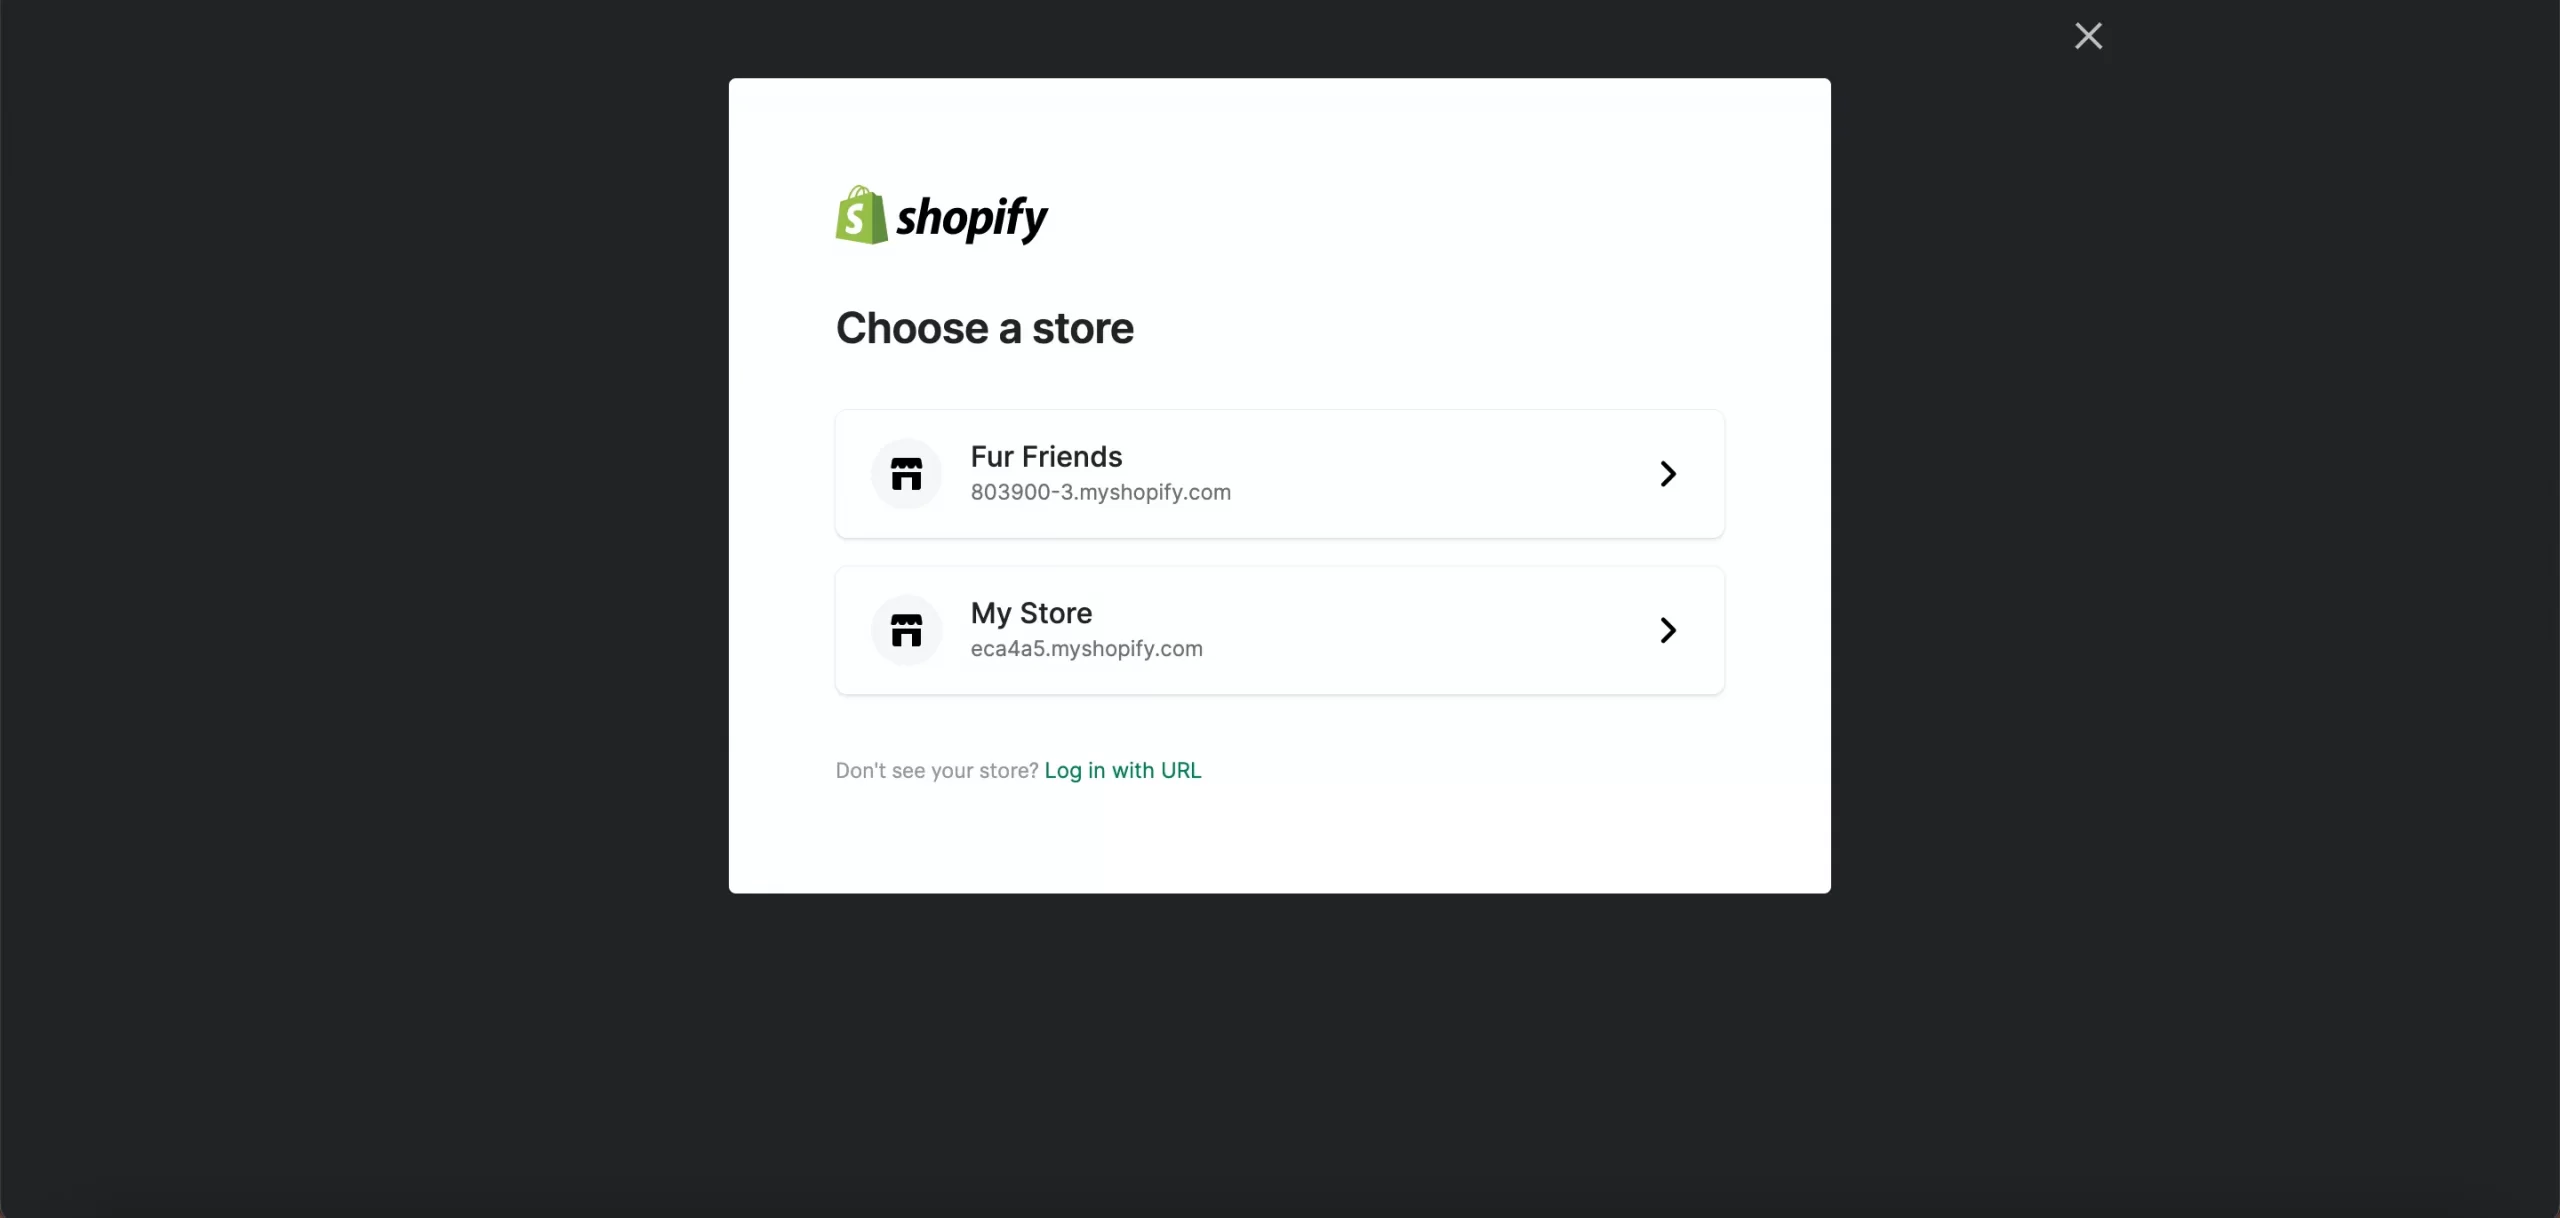
Then click on the Try theme button. After that, the system will ask you which store you want to apply to. Choose the store, and you are done.
Customize a theme for your online store
You can also make some adjustments to the chosen theme to fit your business needs and make it stand out from other online stores on the market.
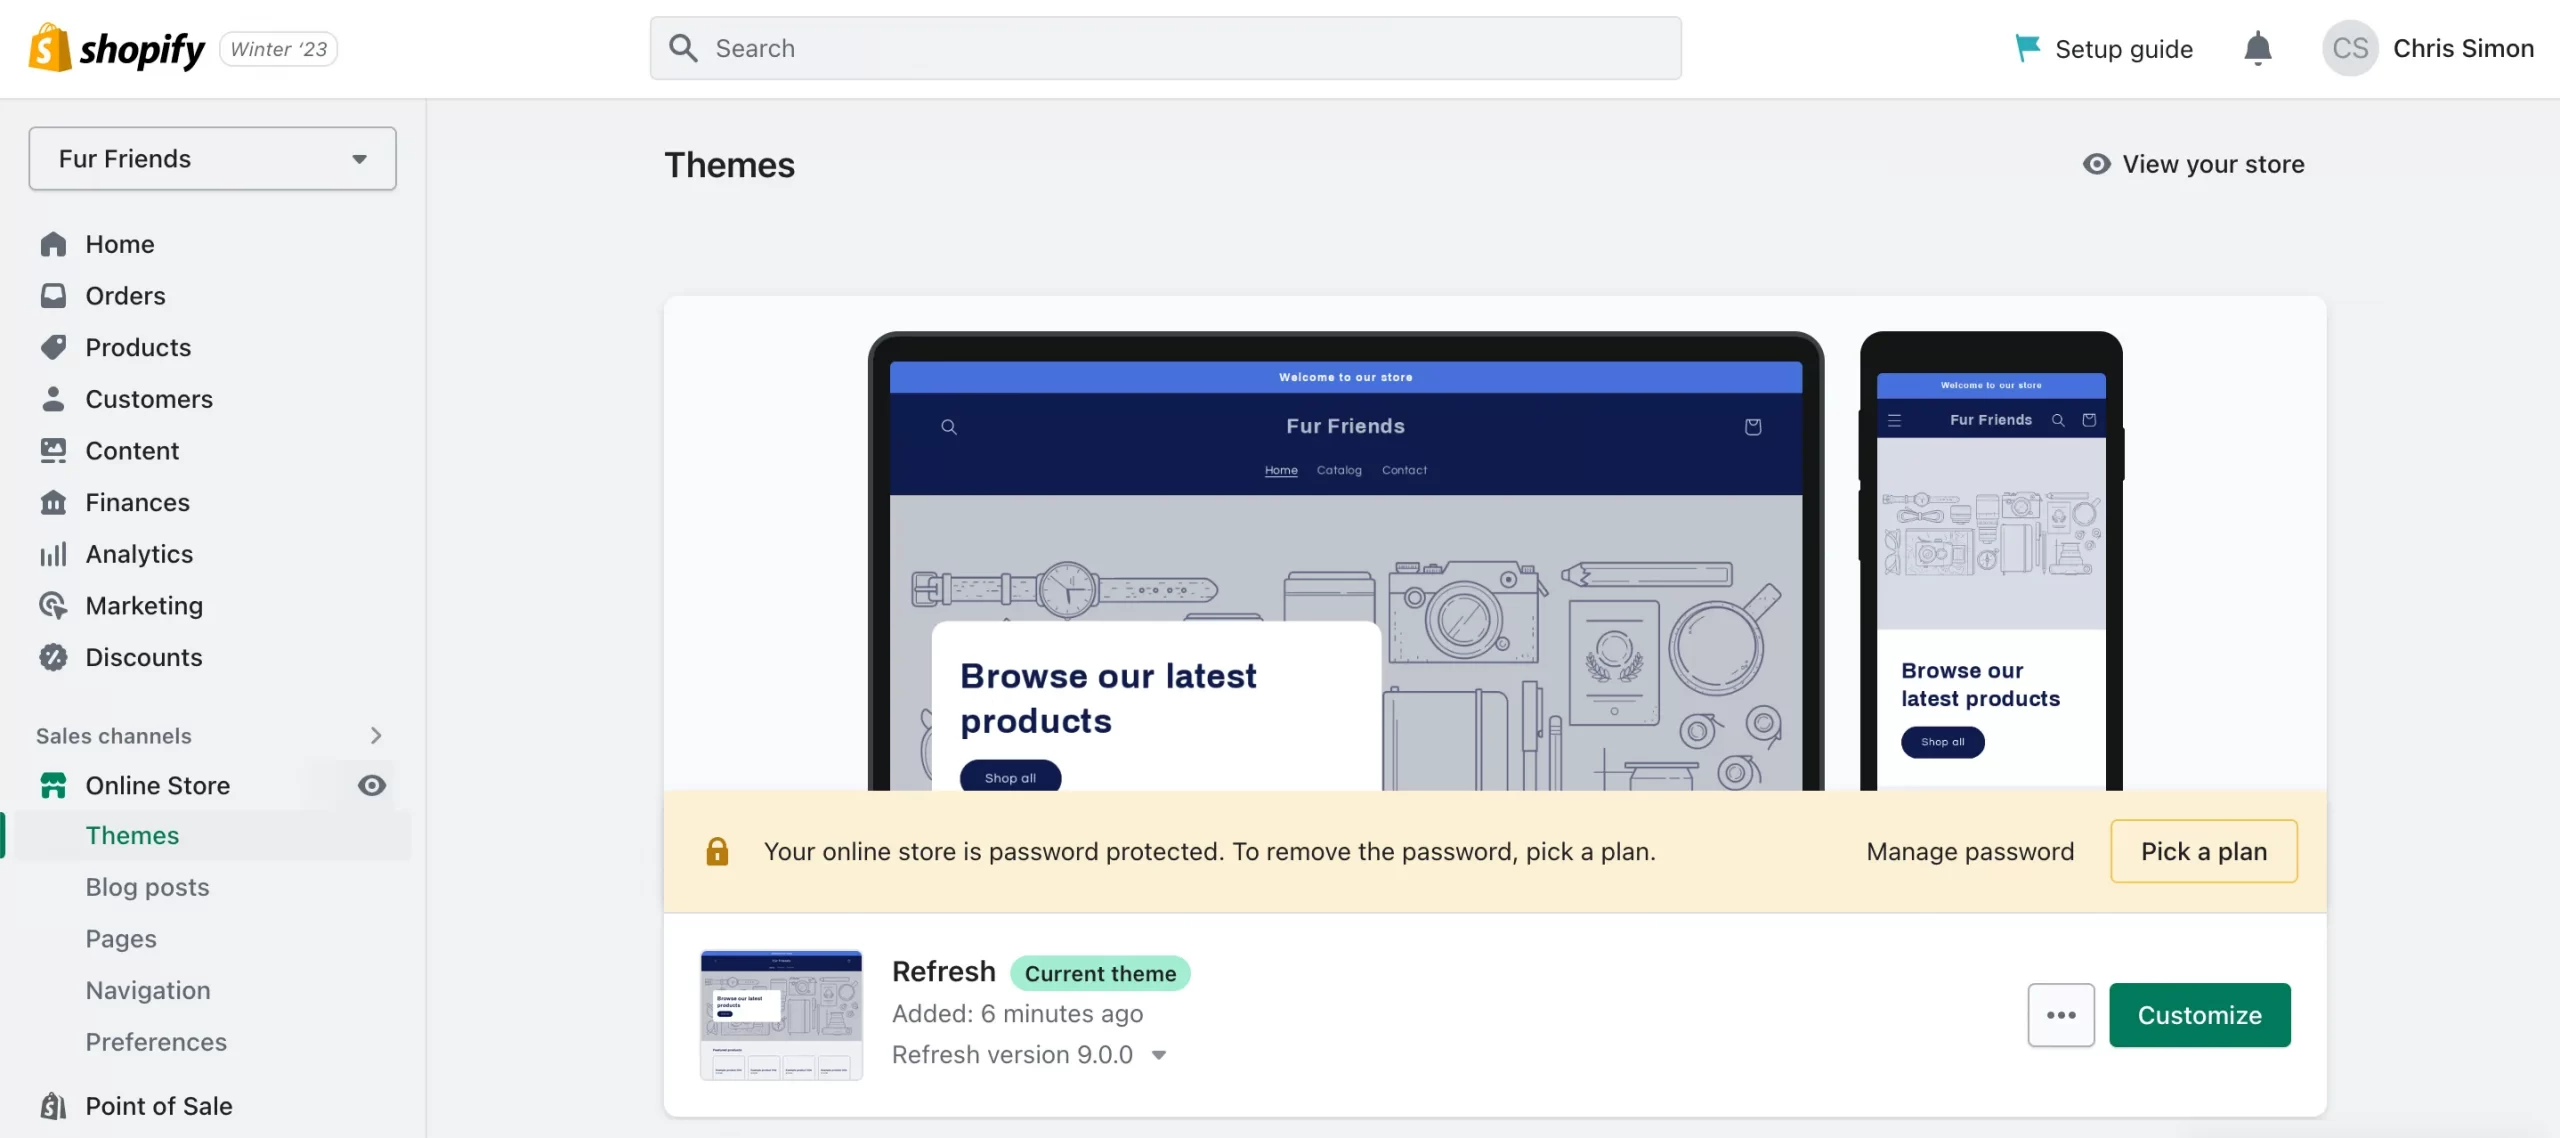
From the Admin dashboard, go to Sales channels > Online Store > Themes. Click on the Customize button next to the theme you want to modify to start editing.
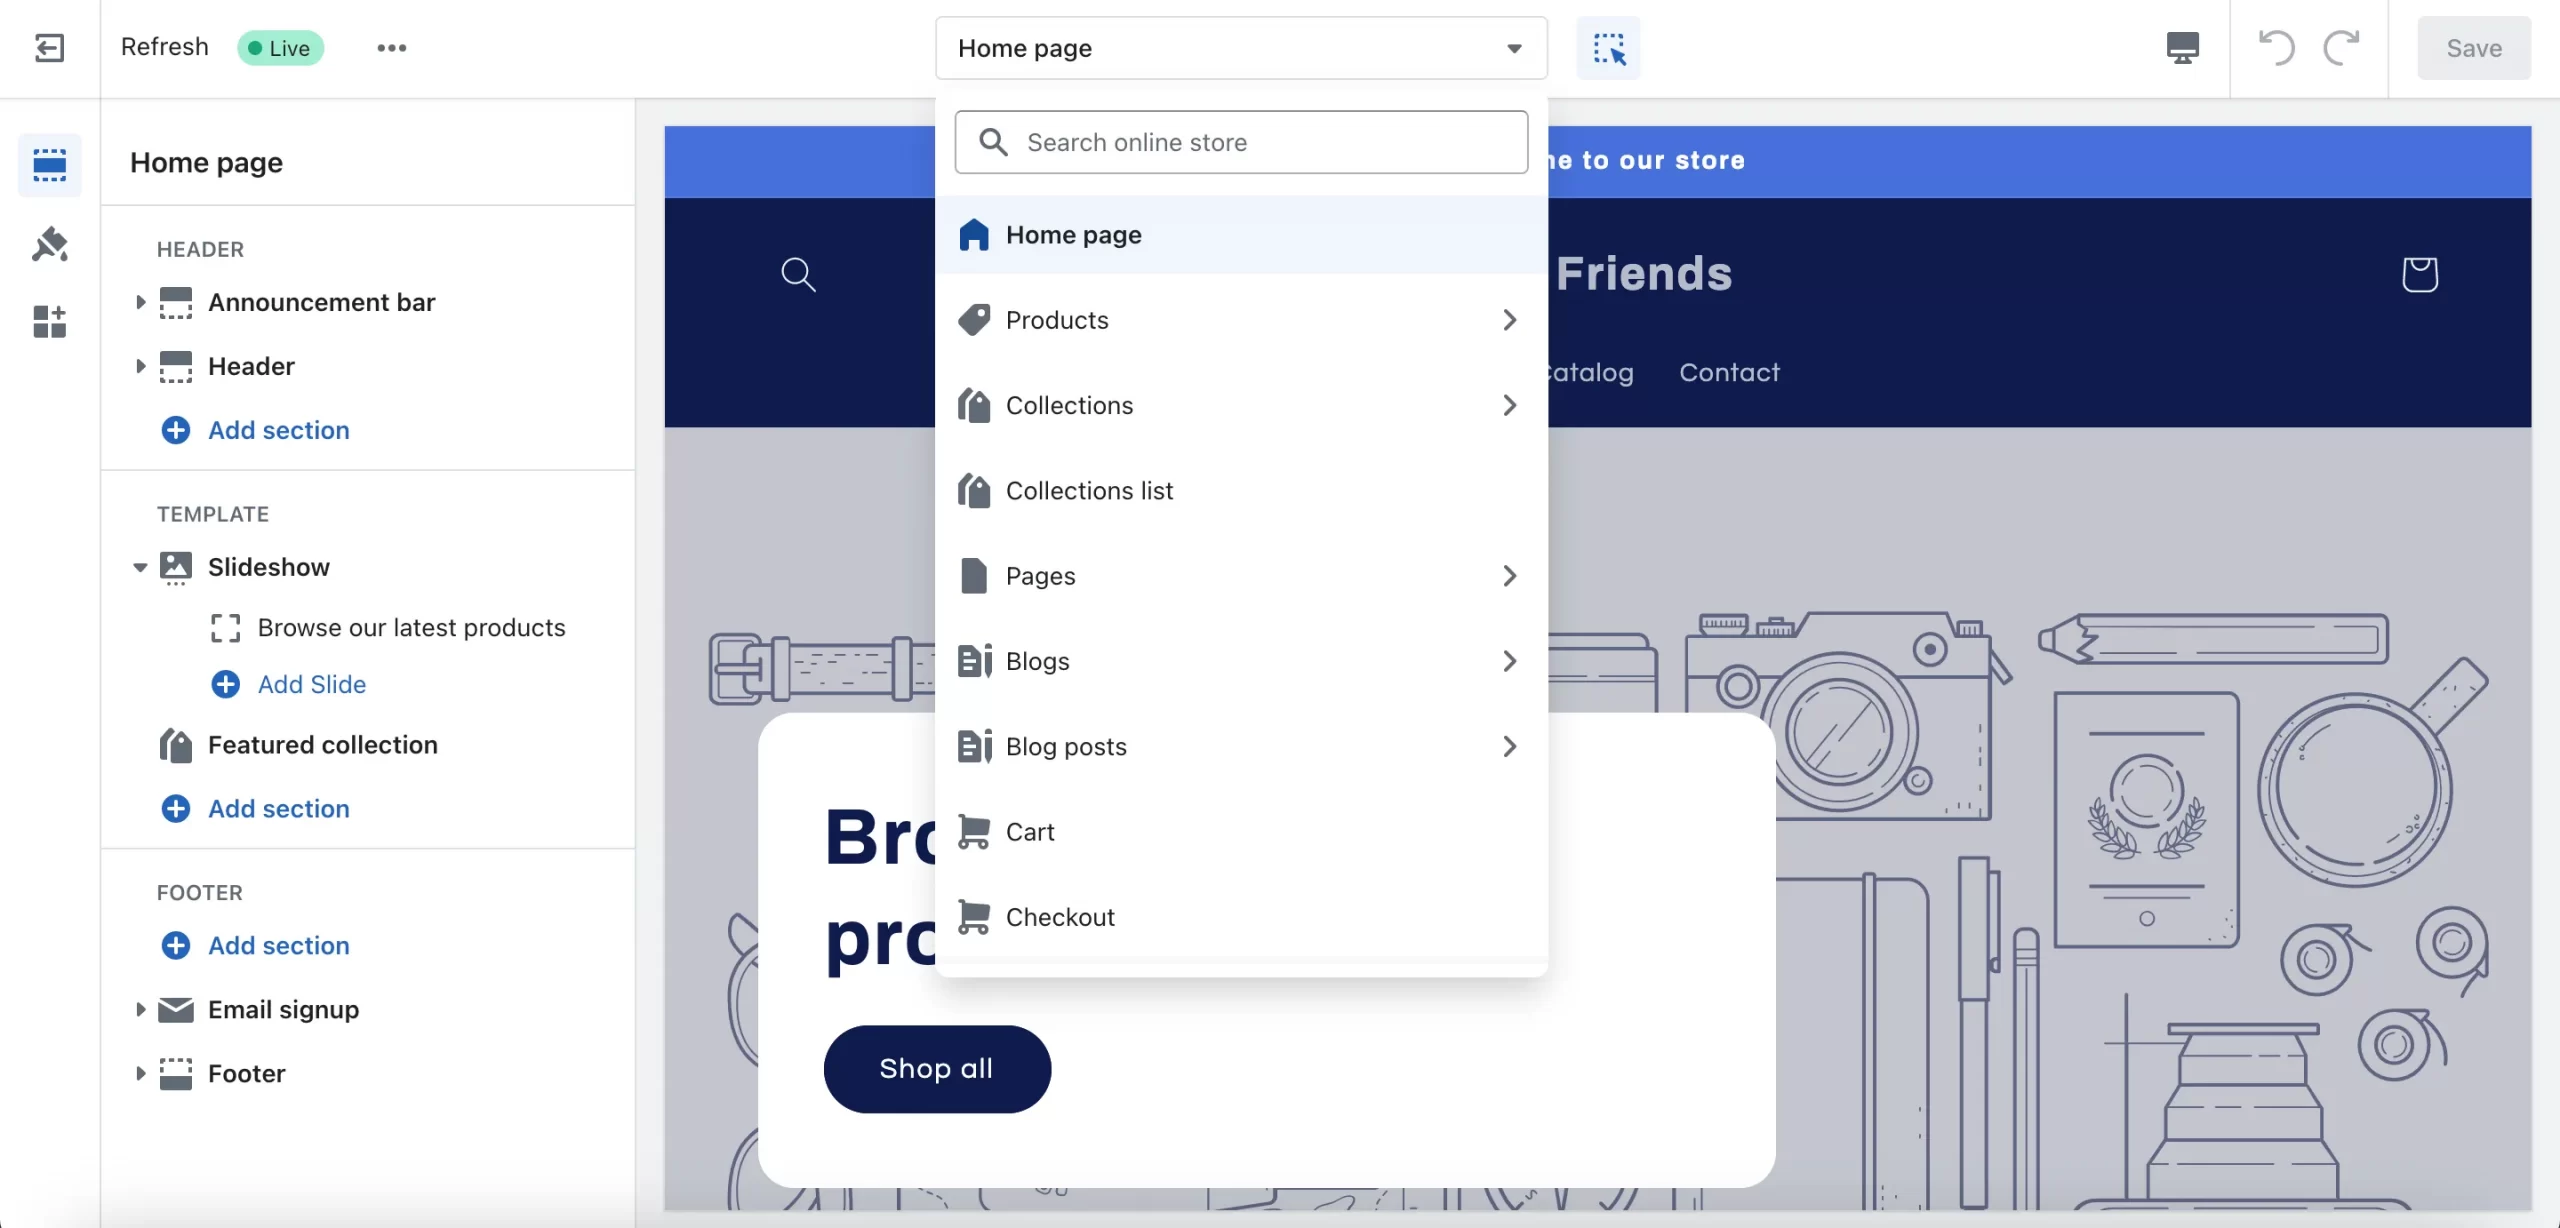
It is not too complicated to customize your store. You can make changes on several pages, such as Home page, Products, Collections, Blog, and more. Any edited elements or parts will be shown on the screen, making the process easier for a newbie. Don’t forget to click on the Save button when you finish editing.
Step 7: Configure essential settings
In this Shopify tutorial, we also highlight the essential settings for beginners who want to know how to create a Shopify store sharply, including payments, checkout, shipping & delivery, taxes & duties, and locations.
Now, go to the Settings page and let us briefly explain five significant configurations that enable you to operate your online business smoothly.
1. Payments
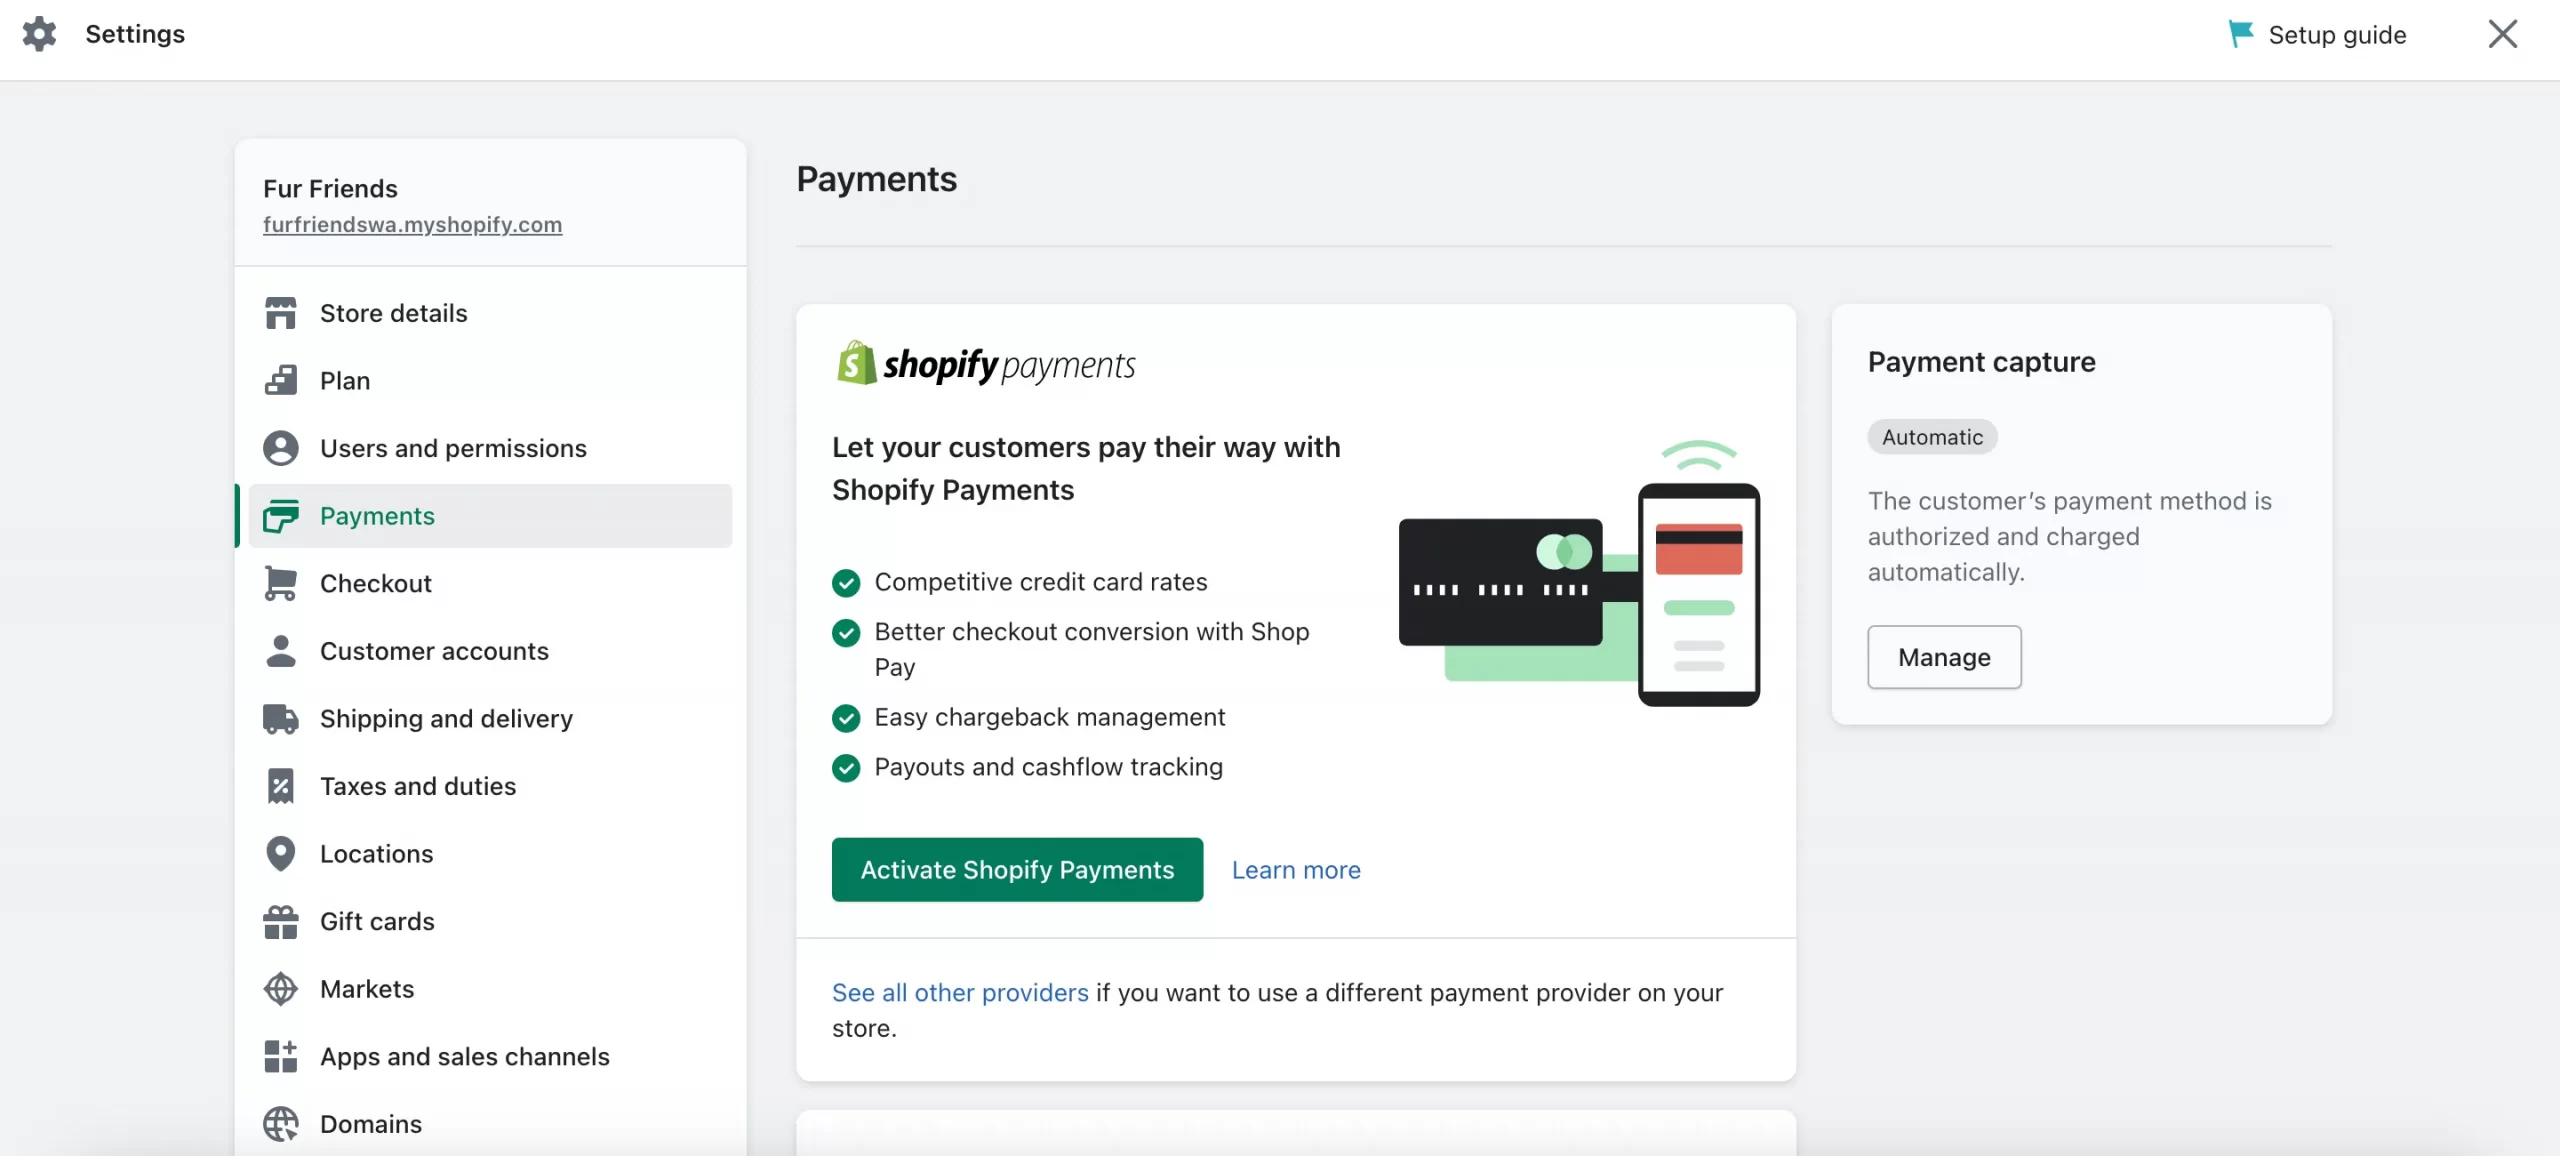
This is how you let your customers pay for the purchased items on your website. It is recommended that sellers should provide multiple and appropriate payment gateways to make the checkout process most convenient for buyers.
For credit card payments, you can choose Shopify Payments or consider a list of more than 100 third-party providers. With non-credit card payments, PayPal or Amazon Pay is also available to choose from.
2. Checkout
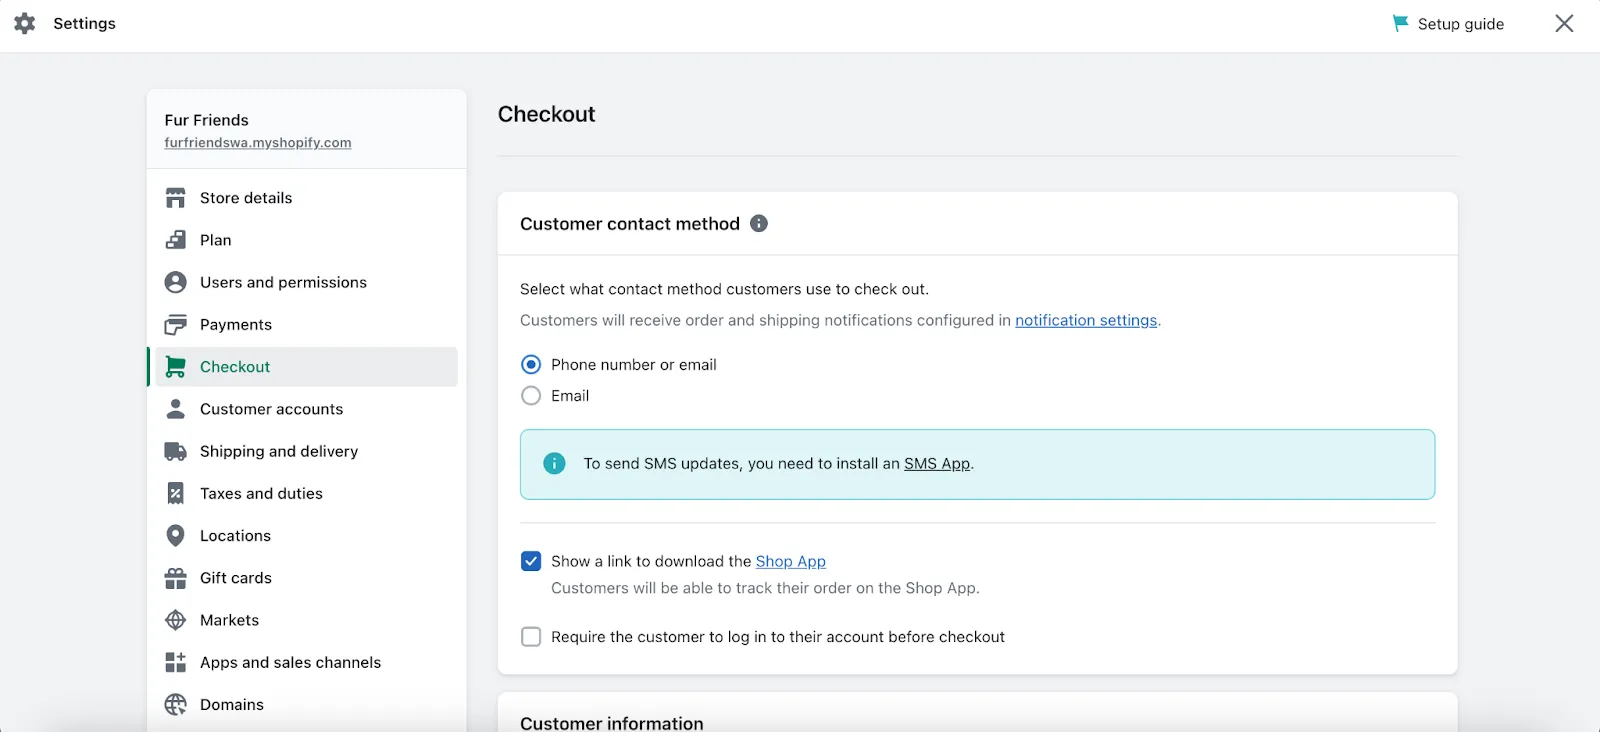
This is where you (as the store owner) confirm orders with buyers. In this section, you can display adequate information to remind customers about their order or delivery information.
Furthermore, Shopify also allows you to create marketing tactics to increase the chances of generating more sales, such as letting customers sign up for email or SMS marketing.
3. Shipping and delivery
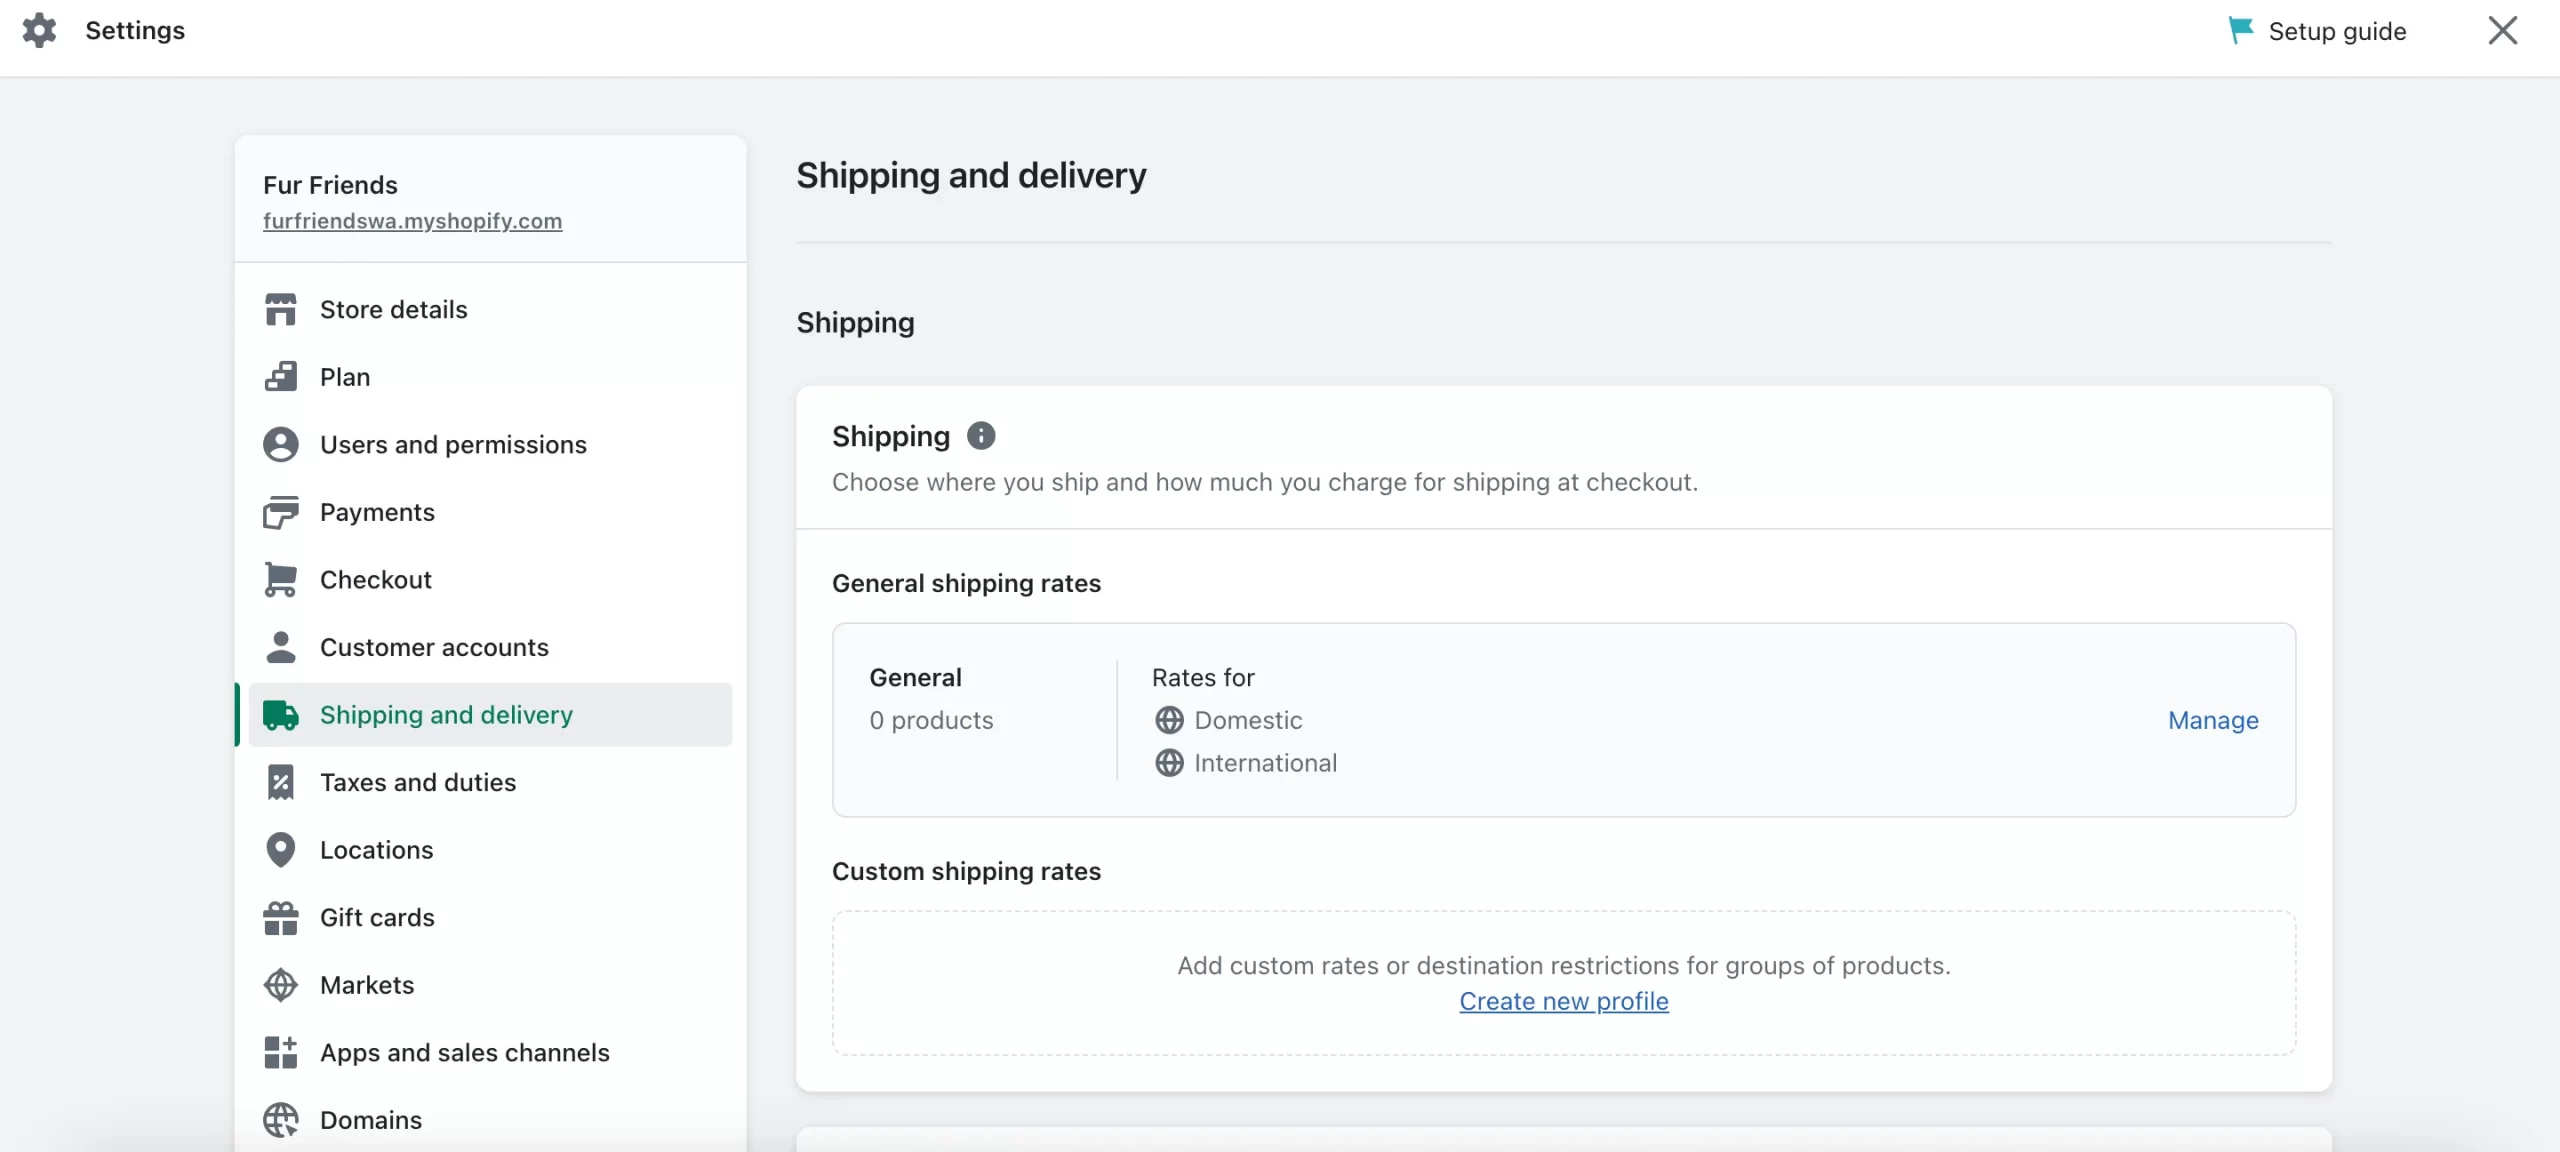
On this page, you can determine delivery settings for your business. Afterward, buyers can choose one of the ways and the shipping zone or prices at checkout based on where they are located.
4. Taxes and duties
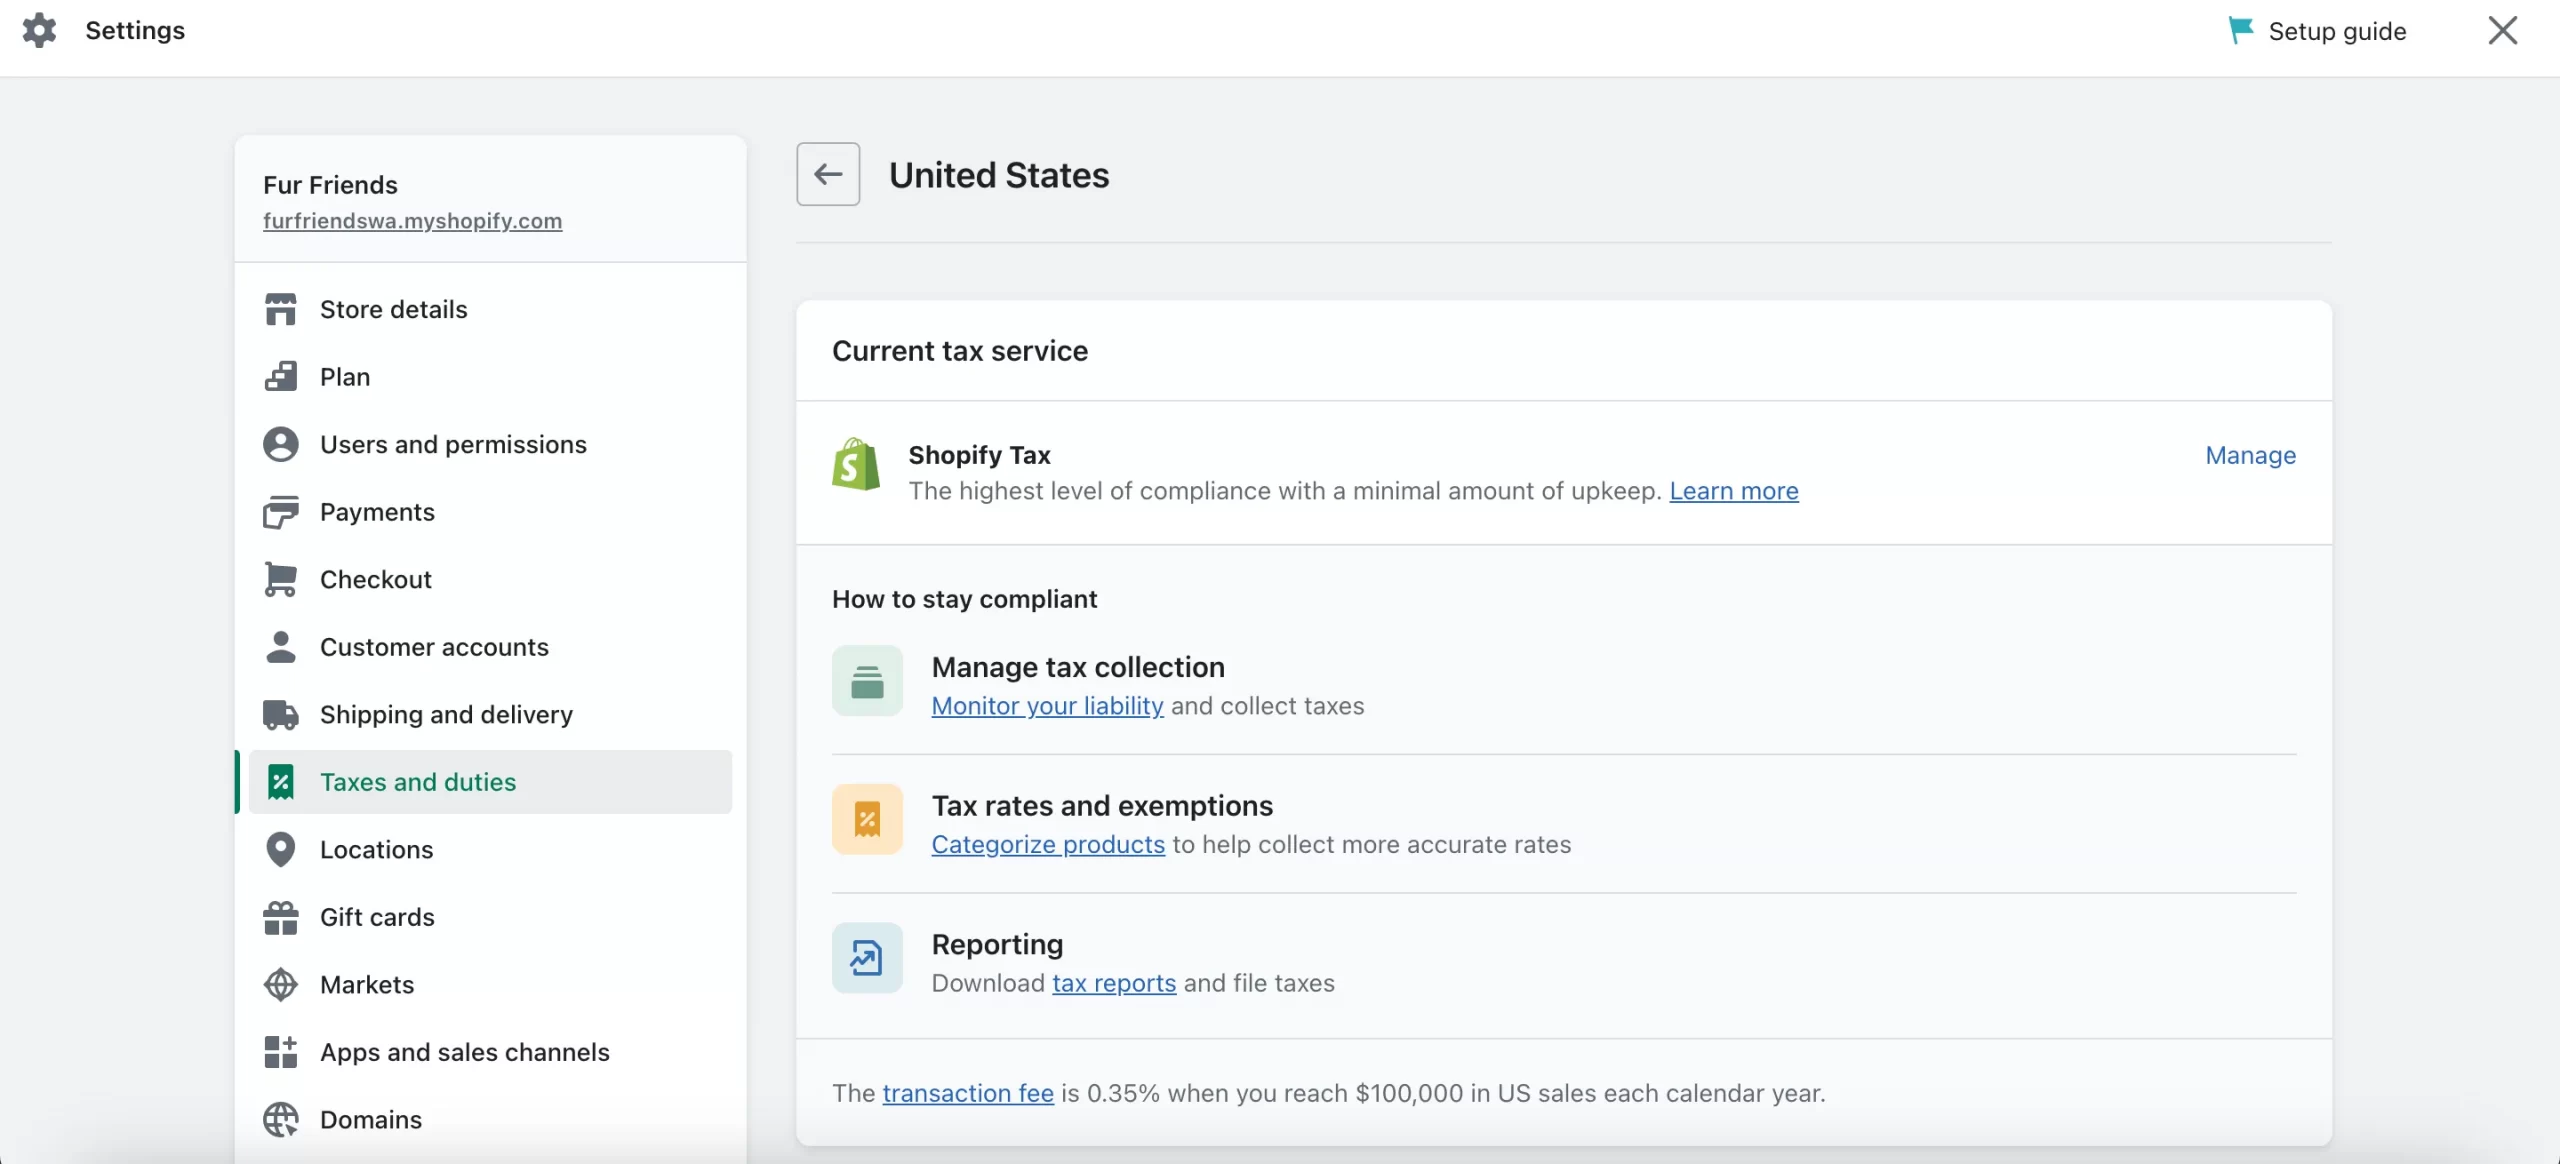
In many countries, it is mandatory to levy a tax on product sales and submit it to the government. Shopify provides a solution to manage taxes and duties in its settings.
The tools simplify the tax calculation process by automatically applying default tax rates based on the region you’re liable in. Furthermore, taxes report is also available to help merchants organize and submit the required tax details to the government.
5. Locations
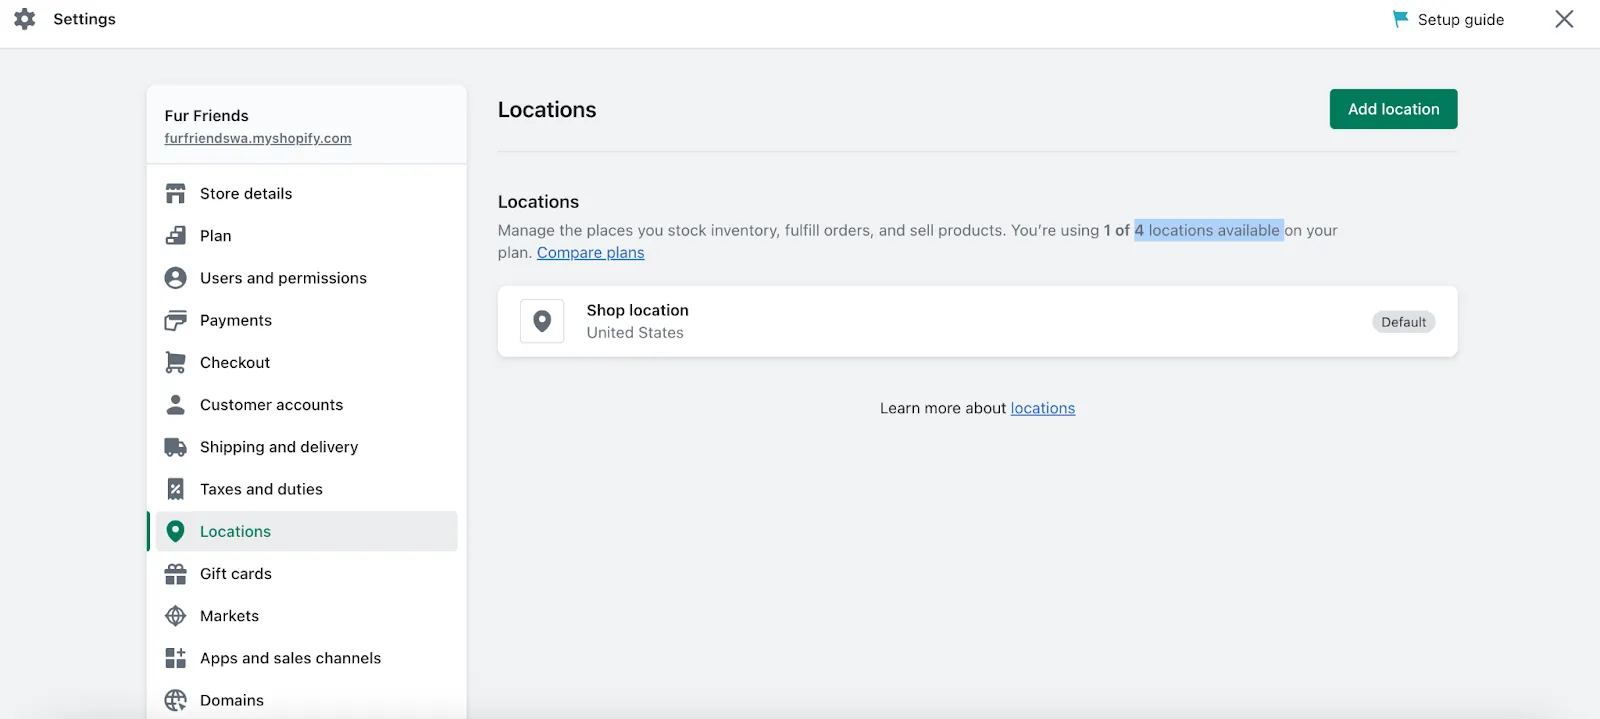
The locations can be any place, for example, outlets, warehouses, drop shippers, or apps that integrate with your inventory. The maximum number of locations available to you depends on the chosen plan. If you are still in the 3-day free trial, you can open up to 4 locations.
Step 8: Pick a plan and start the business
Moving up to the next steps of this Shopify tutorial, when your 3-day trial is expired, it’s time to choose a plan. You can claim the deal of $1 per month for the next three months for any plan, including Basic, Shopify, and Advanced.
From the homepage, navigate to Settings > Plan > Pick a plan. The system will show you a table so that you can compare the differences between the three plans.
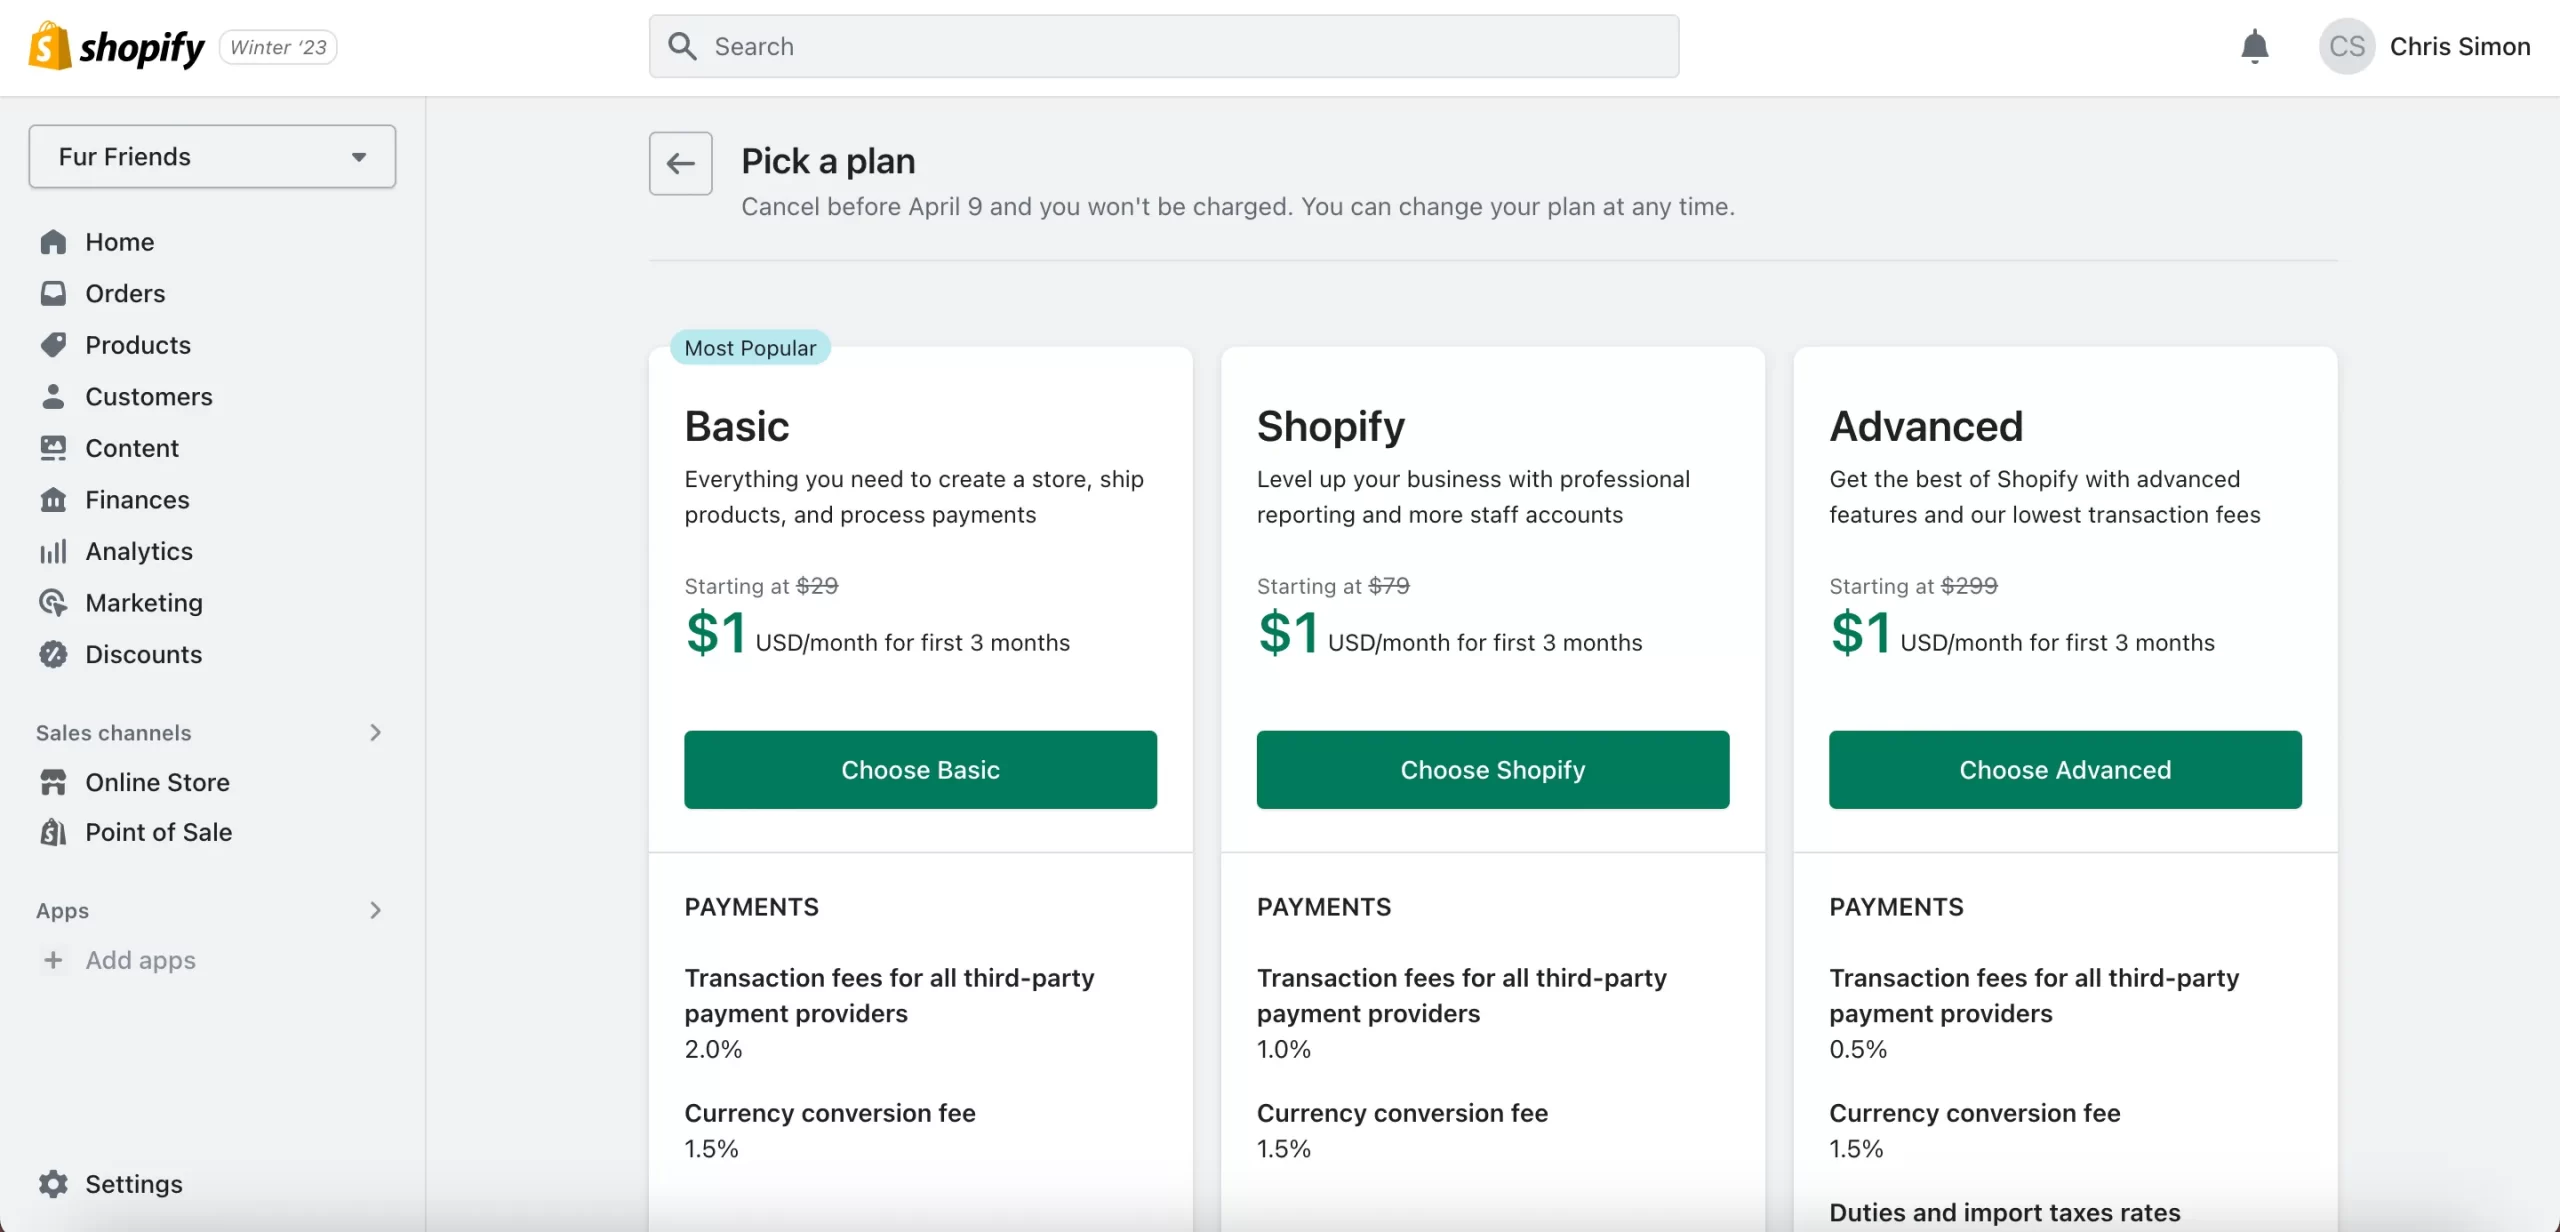
After selecting a plan, remember to remove all storefront passwords to get the store public. Go to Themes > Disable password.
Step 9: Optimize the store with Shopify apps
The final steps of how to build a Shopify store might be choosing apps to extend selling functions. Shopify has an extensive app store that offers over 8,000 free and paid apps for all the different ways you want to optimize your store.
Before installing any app, be sure to read reviews and check the app’s compatibility with your theme and other apps you may have installed. Additionally, keep in mind that some apps may come with additional costs, so be sure to read the pricing information carefully.
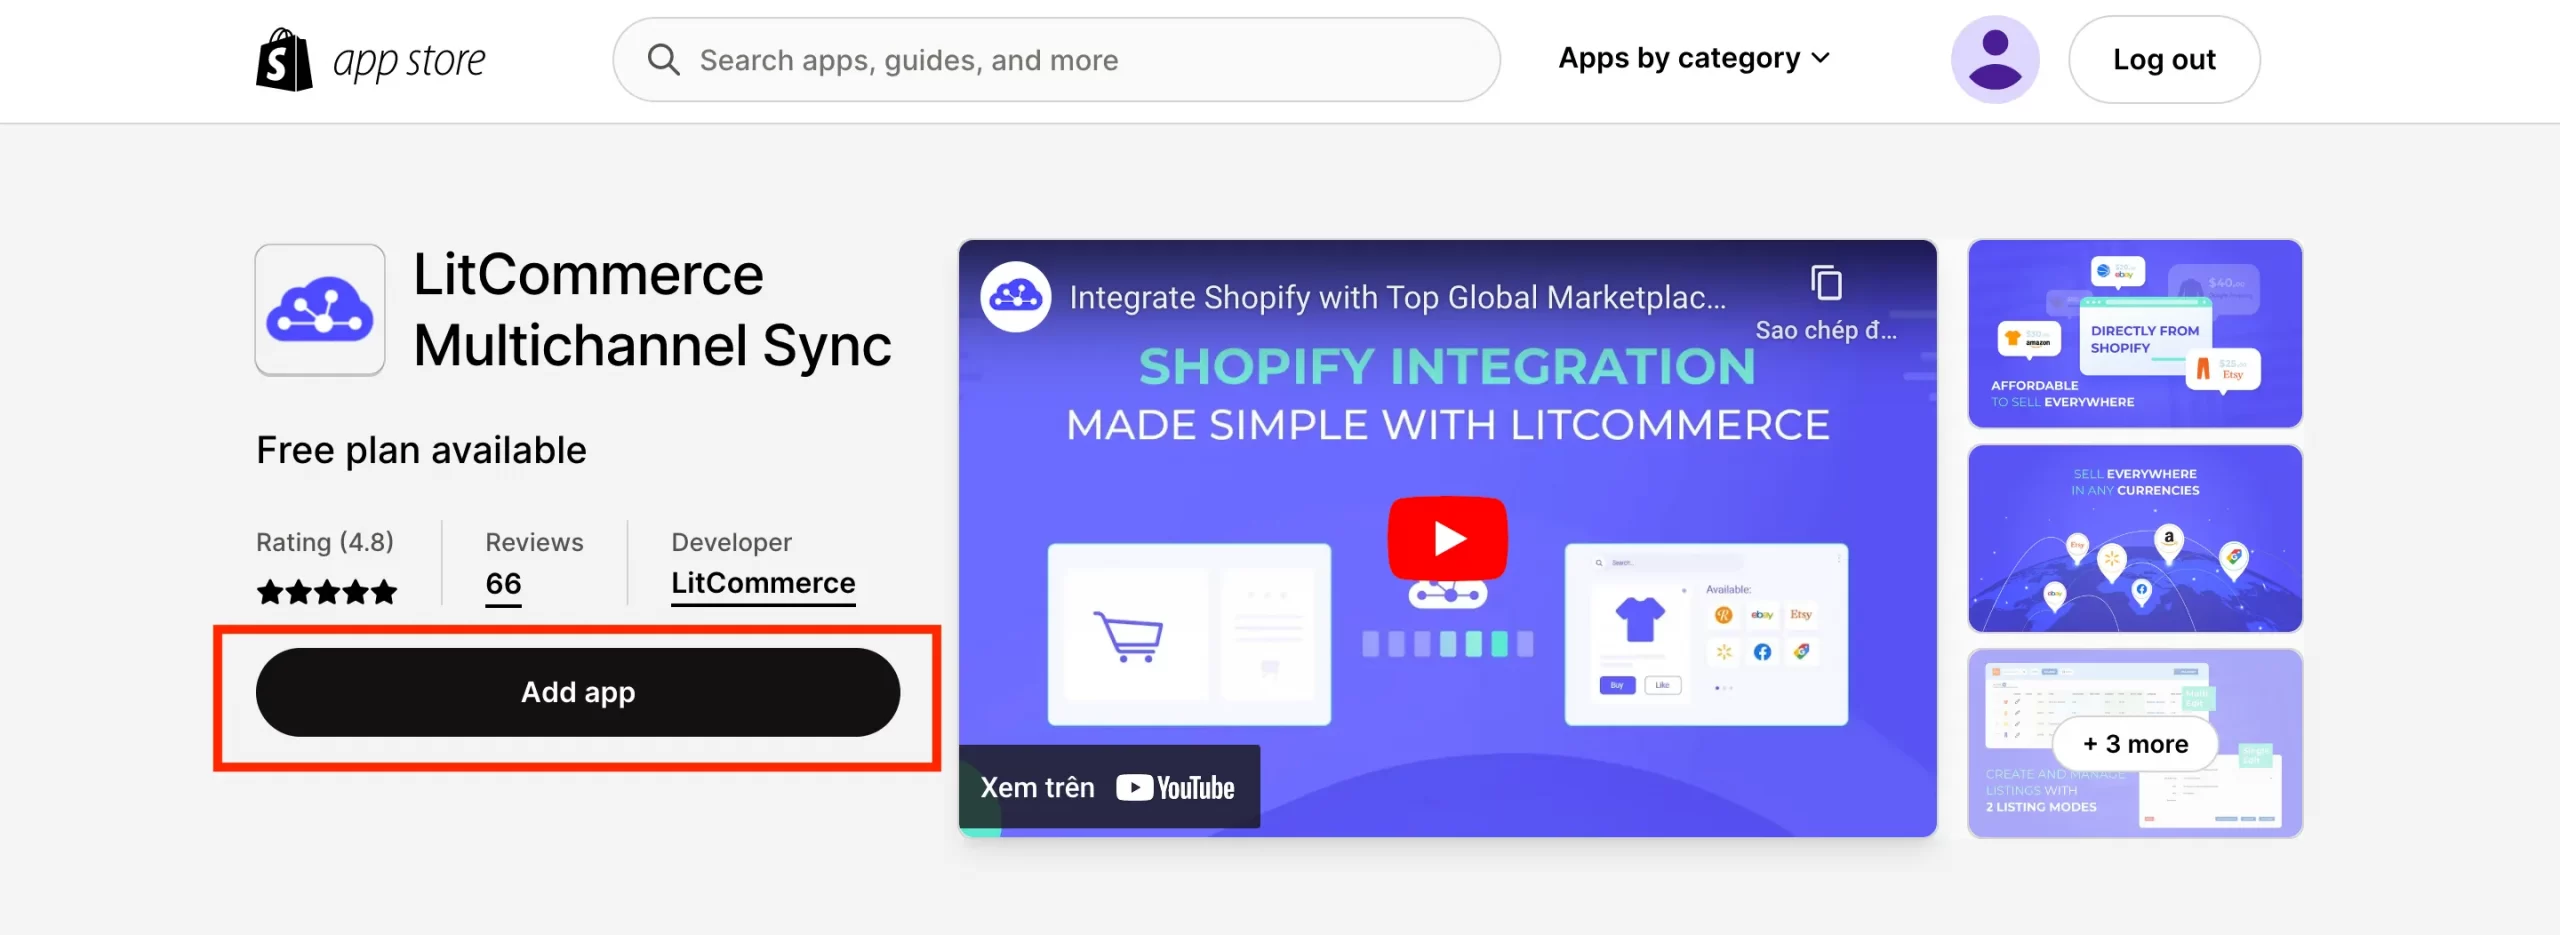
To add an app to your store, go to Shopify App Store, choose the app you want to install, and hit the Add app button.
If you’re just starting your eCommerce journey and thinking about launching a One Product Shopify Store, it’s a good idea to build a strong foundation first. Our guide will walks you through everything you need to know
Shopify Tutorial for Beginners: How To Make The First Sales?
Utilize free traffic sources
For new sellers who just created a Shopify store, the first sources of traffic to explore are the free ones from sharing manually with your network and relevant online communities.
They are a good point to start since these free traffic sources are relatively easy to approach and always available. Herein are some tips that you should not miss:
- Provide discount coupons;
- Add your store URL to your social media profiles;
- Don’t be salesy; look to provide value and make authentic connections.
Spend money on ads
Getting more visitors rapidly through paid advertising is one of the possible strategies to increase sales. It is because the advertising makes targeting specific demographics easier, increases your reach more than organic posts, and converts more paying customers.
Each advertising platform is unique. Hence, sellers should select a channel to promote their items based on the customer persona and approaching methods. Below are some common channels and the recommendations for specific approaches:
- Facebook advertising: A wide range of businesses selling physical products, digital products, or services;
- Instagram advertising: Businesses in the fashion, beauty, travel, and food industries, but can work for any business that can produce high-quality images or videos;
- Pinterest: Stores selling clothing, jewelry, or home decor which have a visual or creative aspect;
- Google ads: Merchants looking to drive traffic to their website or generate leads.
Connect with existing audiences
The message may be ineffective if you’re the only one talking about your brand. However, thanks to the internet, it’s now possible for anyone to create a space where sellers and buyers can connect and communicate without any limits.
You can start spreading your content to everyone who lives nearby, like your friends and people in the local Facebook community. However, in this stage, try to engage with them and create more discussion about diverse topics around your field. For example, if you sell clothes, don’t urge people to immediately buy your items. Instead, show them some mix-and-match tips first and convert them to buying customers when the awareness and your brand presence increase.
By connecting and sharing, you can drive more traffic and build your brand’s credibility. This way, you can achieve two goals at once.
Sell multichannel
Multichannel selling is a strategy that involves the integration process of your Shopify store and other marketplaces. By selling on multiple channels, you can increase the reach, leverage the strengths of many selling platforms, diversify revenue streams, and make the first sales quicker on your Shopify store.
However, manually managing more than one selling channel is never easy, even for an experienced merchant. Ineffective management can lead to overselling, duplicated listings, or poor buying experience.
LitCommerce, a reputed multichannel selling solution, can help you easily tackle these challenges and grow a successful business across many selling platforms. This software allows you to manage orders, inventory, and prices from a single dashboard while offering a near-instant sync feature that simplifies your multichannel selling journey.
Moreover, LitCommerce also supports integrating your Shopify store with many popular marketplaces such as eBay, Walmart Marketplace, and more.
How to Start a Shopify Store: FAQs
- Can a beginner make money on Shopify?
Yes, a beginner can make money on Shopify. Other than the Shopify tutorial, there are plenty of resources, such as Shopify Blog, Business Courses, Help & Support, and sellers community, available to help beginners get started and optimize their stores. With the right approach, a beginner can generate significant profits.
- How to build a Shopify website?
You can successfully create a Shopify store by following the 9-step Shopify tutorial, even if you are new to eCommerce. Herein are all the steps on how to sell on Shopify for beginners:
- Step 1: Create a Shopify account
- Step 2: Explore the dashboard
- Step 3: Add your products to the store
- Step 4: Name your store
- Step 5: Add a custom domain
- Step 6: Choose a theme for your store
- Step 7: Configure essential settings
- Step 8: Pick a plan and start the business
- Step 9: Optimize the store with Shopify apps.
- Does building a Shopify store require coding skills?
No, building a Shopify store does not require coding skills. Shopify provides a user-friendly interface that allows you to build your store without any coding knowledge. Hence, beginners can design a store, add payment methods, list items, and manage everything without being nerve-racking.
Set Up a Shopify Store – Now or Never?
That you have the Shopify tutorial for beginners. By following the steps outlined in this Shopify tutorial, you can create your own Shopify store and optimize it to make bread and butter online on this platform and grow your business.
With enough dedication and effort, you can succeed in your eCommerce journey. To help you on this competitive game, we also provide more eCommerce information, insights, sharing, and tips on our retailer blog and seller community. Check it out!
Moreover, remember to take advantage of multichannel selling to optimize your store further. Drop us a message to figure out how you can expand your selling site into top eCommerce marketplaces at a glance.


