Reverb Integration Guideline
If you are an online seller on Reverb, you can enhance your selling experience by utilizing LitCommerce, a comprehensive multichannel listing tool specifically designed for Reverb sellers. This tool simplifies the process of selling on Reverb and provides robust features for efficient Reverb listing and multichannel integration.
The integration process with LitCommerce involves 4 primary steps:
1. Connect with Reverb
2. List products on Reverb
3. Enable Reverb sync
4. Manage orders
For a detailed guide on integrating with Reverb, please refer to our comprehensive guide on Reverb integration with LitCommerce:
#Step 1: Connect with Reverb
To initiate the integration, establish a connection between your chosen eCommerce platform and LitCommerce. Log in to your LitCommerce account and access the Source Store setup page. Select your eCommerce platform from the supported options such as Shopify/Shopify Plus, WooCommerce, BigCommerce, Squarespace, or Wix. Your eCommerce platform will serve as the source store for data import and order management.

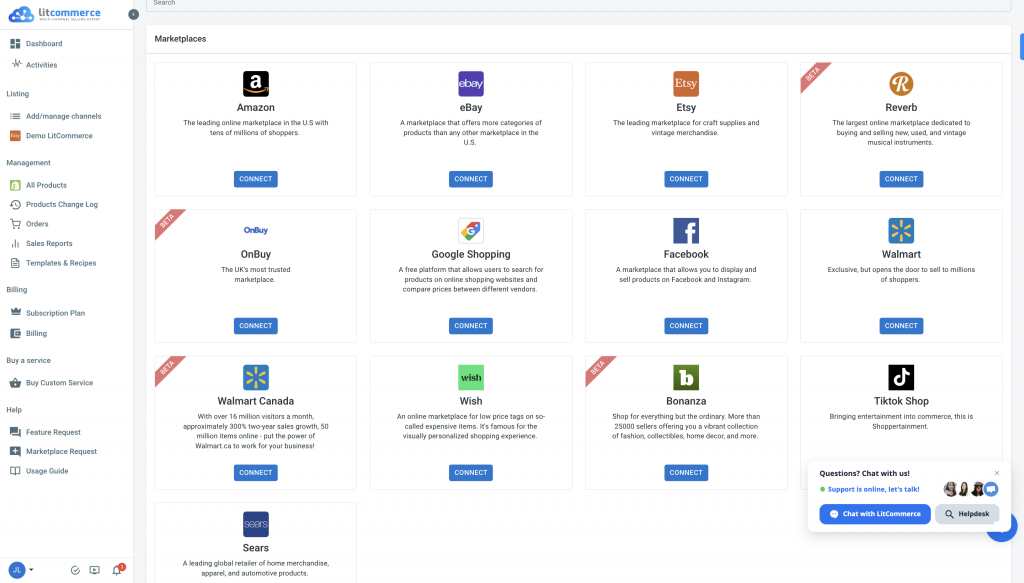
Provide the required information specific to your platform’s requirements. Once you connect your online store successfully, proceed to connect with Reverb. LitCommerce supports integration with 15+ marketplaces, including Reverb, Amazon, eBay, Etsy, Wish, Google Shopping, and Facebook.
By creating a Reverb account and assigning a nickname, easily connect your Reverb account to LitCommerce. Note that certain marketplace listings may involve additional costs.
#Step 2: List Products on Reverb
After establishing the connection, it’s time to list your products on Reverb. Using LitCommerce’s intuitive interface, effortlessly create new draft listings.

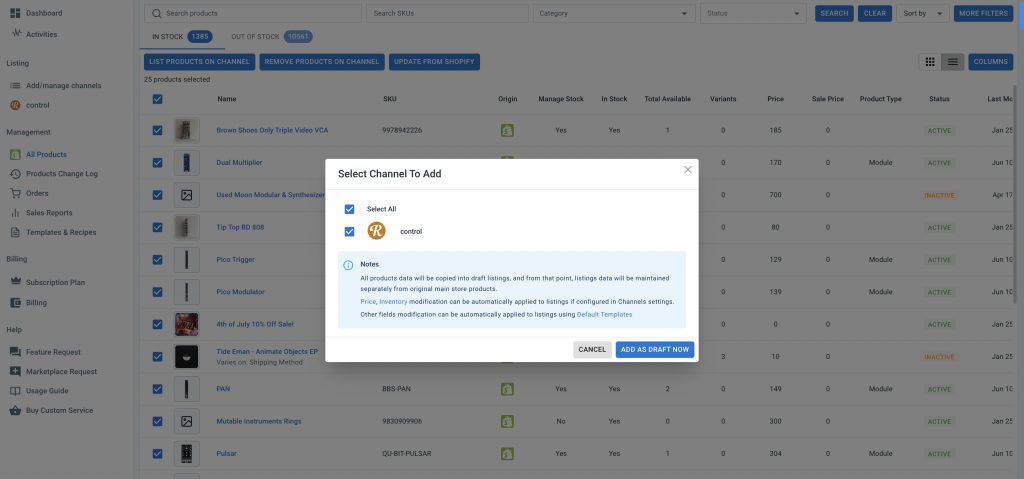
Navigate to the “All products” section in LitCommerce, select the desired products, and choose Reverb from the list of channels. Customize and optimize your listings according to Reverb’s requirements and guidelines. Ensure accurate product information, compelling descriptions, and high-quality images.
Once you make the necessary edits, publish your listings on Reverb.
#Step 3: Enable Reverb Sync
LitCommerce enables seamless synchronization of inventory, pricing, and orders between your online store and Reverb. Enabling the Reverb sync function ensures that any price adjustments made in your online store will be automatically reflected on Reverb. This eliminates manual updates and maintains consistency across all channels.


To enable Reverb sync, access the main dashboard of LitCommerce, select the Reverb channel, and go to “Channel Settings.” Toggle the switches beside the sync options in each section (Pricing, Inventory, Order) to activate the corresponding features. Confirm the changes to initiate the synchronization process.
#Step 4: Manage Orders
Efficient order management is essential for successful selling on Reverb. LitCommerce simplifies order management by seamlessly integrating with your online store’s dashboard.

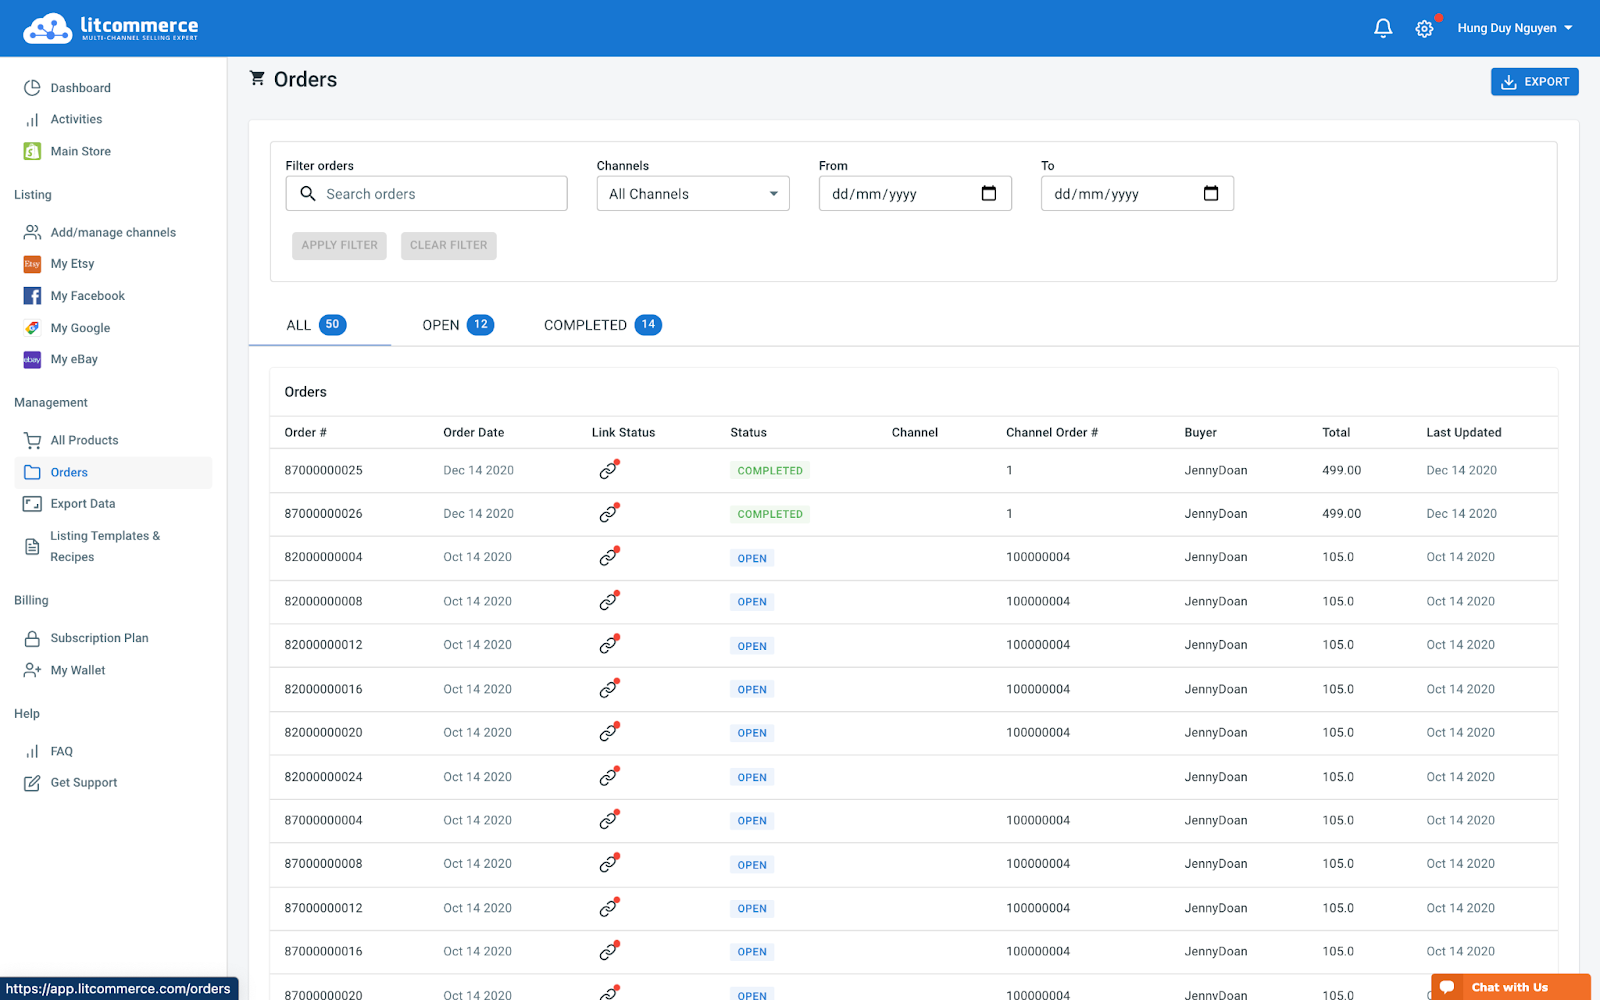
To manage Reverb orders, go to the “Listing” section in LitCommerce, select your Reverb sales channel, and access “Channel Settings.” Click on the button to import orders from Reverb to your online store’s dashboard. This allows you to conveniently review and fulfill orders. LitCommerce enables order tracking and efficient fulfillment management. The order page consists of tabs for All, Open, Completed, Ready to Ship, and Unlinked orders, providing clarity and organization.
By following these 4 crucial steps of integrating with Reverb using LitCommerce, you can tap into Reverb’s extensive customer base and maximize your selling potential. LitCommerce offers dedicated support throughout the integration process, ensuring a smooth and successful experience.
Take advantage of LitCommerce’s popular integrations, such as
- Shopify Reverb integration
- WooCommerce Reverb integration
- BigCommerce Reverb integration
- Wix Reverb integration
- Squarespace Reverb integration.
Start integrating with Reverb using LitCommerce today and witness the growth and success of your business!